
how to enable one-click opt In On flodesk (+ other Flodesk link action tips!)

I’ve been a Flodesk-er for a good few years now, and having used it to grow my list from zero (not counting my Mum & my 😽) to 4 figures, I’m a huge fan - you can see my review of the Flodesk here.
And as of a few months ago, my fan-girl status has reached new heights because it has recently become possible for us to enable one-click opt in (or out!) in Flodesk!
This ENORMOUSLY helpful functionality — basically someone clicks a link in one of your emails & can be added or removed from a segment or workflow (I’ll talk about ways to use it shortly) — in my opinion is an absolute must-have these days as more tailored & personalised email marketing is more & more expected by your audience.
In fact, personalisation of your emails can increase open rates by 11% and Click Through rates by 27% - it’s not a small impact!
Oh and did I mention — like most things on Flodesk — it’s the easiest peasiest thing to implement & there are some fabulous use cases (some of which you may not have thought of) to use Flodesk Link Actions to up your email marketing game & better serve your audience…
Here’s the low down!
(Oh & if you haven’t tried Flodesk yet - grab a 7 day free trial here & 50% off your first year - yep, that’s an affiliate link 😍)
This post may contain affiliate links. If you make a purchase via one of these links I may get a small kickback. I only recommend products and services I use and love myself! Thanks in advance :)
Use Cases for Link Actions in Flodesk
There are so many great use cases for Link Actions in Flodesk - from allowing people to opt out of emails about a certain topic, to sending people interested in a certain thing down a “funnel” to even allowing you to “quick survey” your audience on a specific question.
Here are my top ideas & how they can help your business.
one click opt-in
Gone are the days that for people to sign up to an event/ webinar/ bootcamp (delete as applicable!) you need to send them to a landing page & have them sign up there… With link actions, you can literally have people click a button or text link in your email and have them be automatically signed up to whatever event you’re running.
This is fabulous to reduce friction (eg. people click the link to sign up, but then get distracted & don’t actually end up signing up) and increase your conversion rate of sign ups!
one click opt-out
One click opt-out, is basically what it says on the tin!
It’s brilliant if you’re going to be emailing your audience about a specific topic for a period of time and you don’t want people to start leaving your list in droves because they’re not interested. For example you’re launching a product, or doing an affiliate launch for someone and you know it won’t be relevant for all of your audience, but you’re not sure who yet. Pop in a short snippet at the top & bottom of your emails that says something like
“Not interested in becoming a web designer right now, but don’t want to leave the party just yet? Click here to press the snooze button on emails about the Webdesigner Webinar”
With link actions you can then set it up, so that when they click the linked text, they get automatically added to a segment that you can exclude from all future emails about that topic!
Funnel triggers (one-click workflows)
Ok, this one sounds complicated… but it’s not really. Firstly, let’s be clear on what a funnel is. A funnel is a series of experiences that you “send” someone through that lead them to eventually being pitched your paid offer.
It usually starts off with them downloading a free gift from your website, and is followed by a series of emails that eventually pitch them something you’d like them to buy. But what if you’ve got a new offer and you’d like to send those of your existing audience who might be interested in it down a funnel?
That’s where funnel triggers come in. Essentially, you set up a workflow of emails that acts as your “funnel”. Then within an email that you send to your whole list you give people the opportunity to opt into this by sharing with you that they’re interested… for example…
“Need more help with managing your salon staff and culture? You’re in luck, I’ve compiled a fabulous set of resources just for you - click here to get access”
Waitlists & interested in
Thinking ahead is always a smart idea! And link actions make this easy for you!
Know you’re planning to launch a product or service in the future, or perhaps you’re just wondering whether you should?
You can use link actions to allow people to very simply add themselves to a waitlist OR say they’re interested in something (which may help you decide whether to create and offer it or not).
For this you might want to add a button to your email that says JOIN THE WAITLIST.
Or, if you’re testing the water, you might want to set up a Link Action to add people to a certain segment if they click a link that relates to that topic area (eg. you’ve written a blog post about how to offer VIP days - you may wish to set up a link action that adds people to a segment that’s called “Interested in: VIP days”).
Then if you realise a big proportion of your list is interested in how to offer VIP days you may decide to create that masterclass you’ve been wondering about doing for aggeess.
Self segmentation
I’ve very recently done this with my own list.
Why?
Well I’m pretty sure that I have a mixture of people who are web designers/ brand designers or aspire to be, who follow me for business tips & web designer business inspiration & ideas. But I also have a bunch of people on my list who are small business owners following for tips for their own websites - they’re not interested in becoming web designers (they already have their own businesses).
Because I create content on both of these topics (and general content that’s relevant for both groups) it’s really useful for me to know who’s who so I can better tailor what content I’m sending to who in my audience.
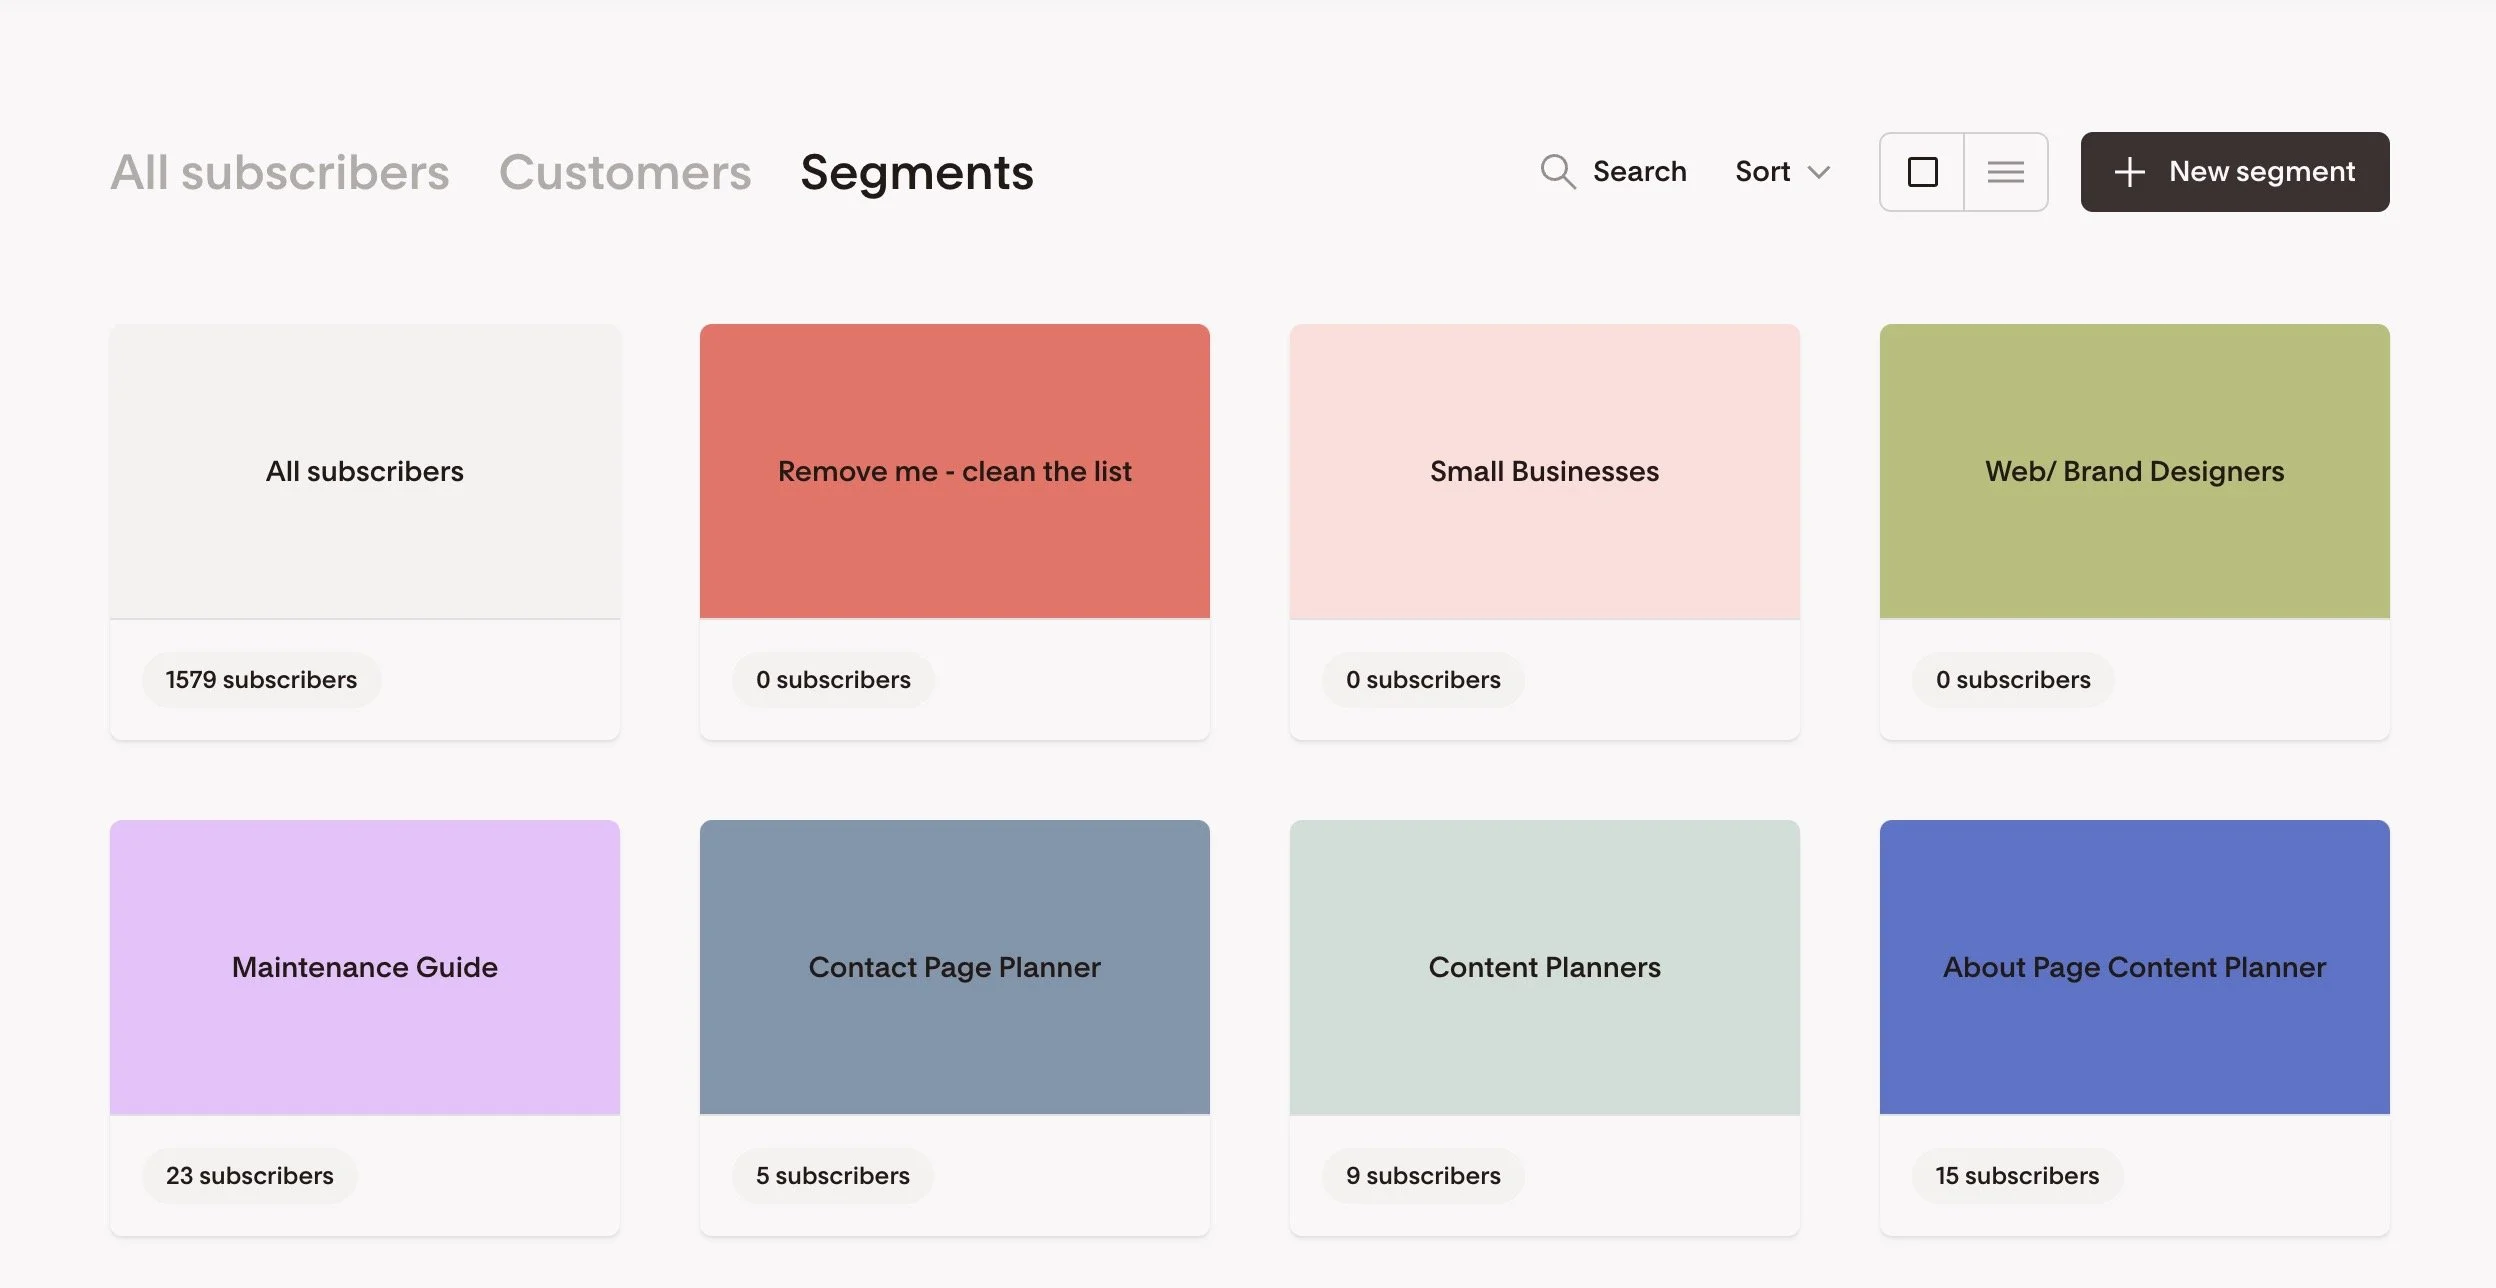
A very simple way to do this with link actions in flodesk, is literally to ask people to click on the sentence that best describes them from a short list. Then associate each list item with a link action to add them to a segment of your list.
Et voila - they’ve self-segmented & you can send the right content to the right people! (See my example of this below!)

5. personalisation
Finally, simple personalisation (which can be merged with your segmentations because (yep - you can have more than one link action happen when people click a link in your emails!). This might be asking a question in your email that people can click on which adds them to a segment, but also adds a custom field to their profile. With a custom field now added, you can insert this (just like you do with their names) into your emails.
For example you’re a baby sleep consultant & you ask your customers what they’re struggling with the most
Their baby napping in the day
Their baby getting to sleep at the beginning of the night
Their baby sleeping through the night
From here you could add a custom field that references their struggle and then add that custom field into future emails to better personalise them.
So Many creative Ways to Use Link Actions in Flodesk!
As you can see there are sooo many ways you might use link actions in Flodesk to better personalise your audience’s experience, increase open and click through rates anddd reduce unsubscribes.
So how do you actually go about setting up one-click opt outs and other link actions on Flodesk?
How to add Link Actions in Flodesk
Adding link actions in Flodesk is genuinely the easiest thing in the world to do!
1. Decide what you want your link to do - you can
Add someone to a segment
Remove someone from a segment
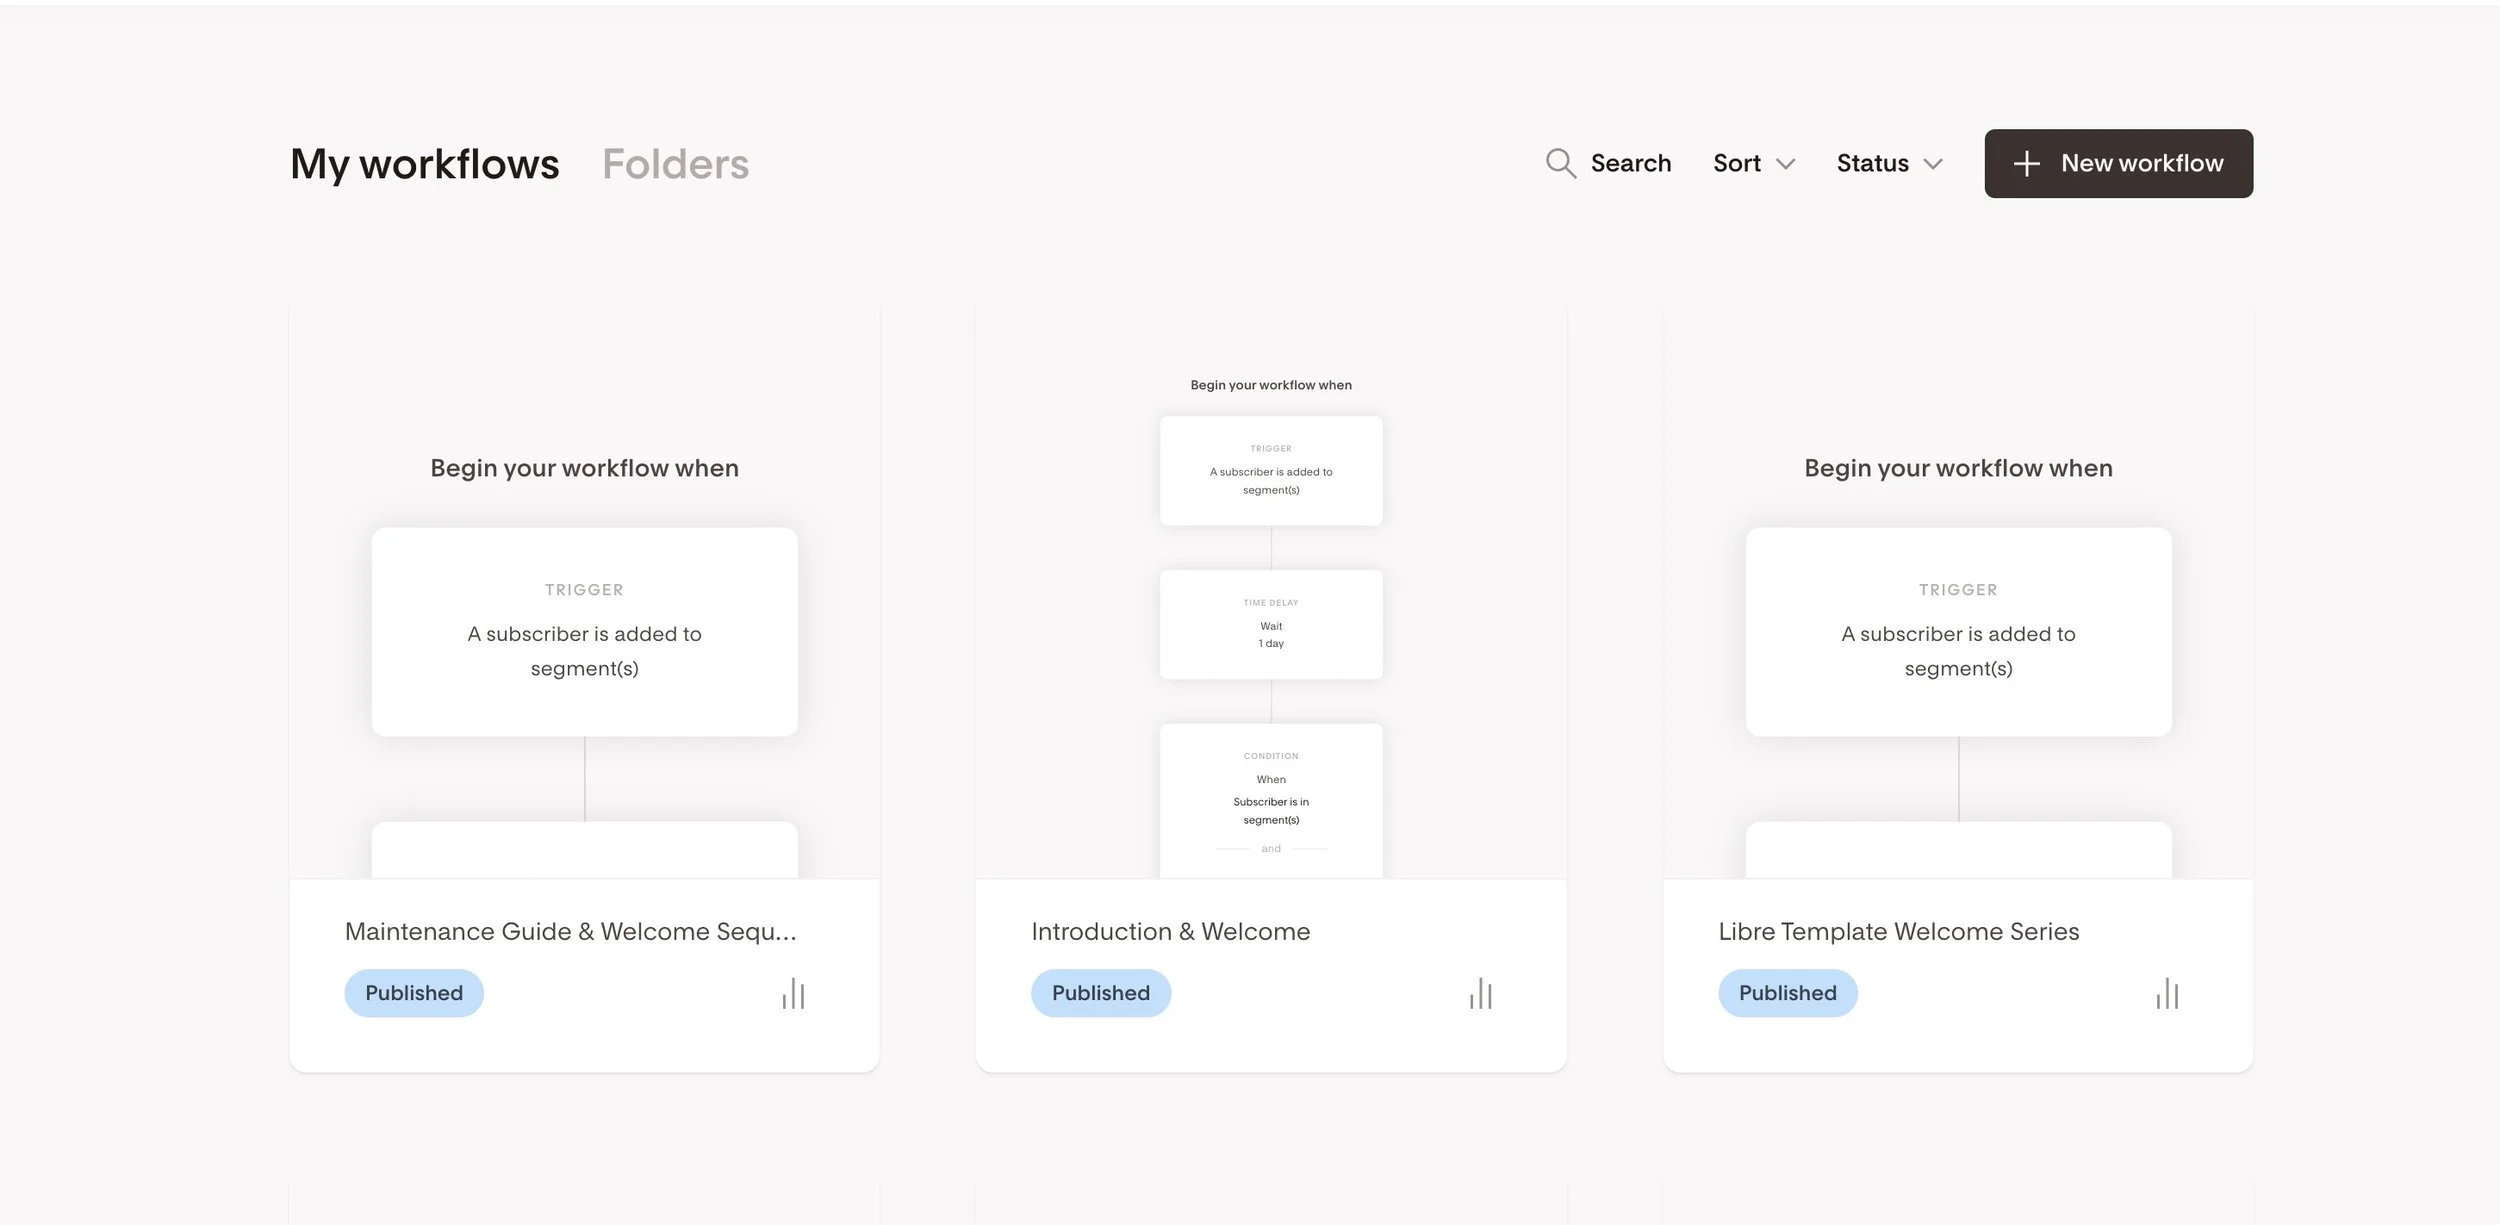
Add someone to a workflow
Remover someone from a workflow
Add a custom value field
2. Set up/ create that segment, workflow or custom value field (you’ll need this to select from later when adding your one-click link action)
To add a Segment go to Audience > Segments > New Segment
To add a workflow go to Workflows > New Workflow
To add a custom value field go to Audience > Click on an Audience Member > Select Segments & Data > Add Custom Field

3. Create a landing page for the person to be sent to when the click the link in your email (this can be as simple as “your preference has been noted”) OR of course - if you’re going to be adding link action to a link that’s going to a piece of content/ file that already exists you can skip this step.
Not sure how to create a landing page? Here’s how to create a landing page on Squarespace!
4. Write your email and add a link as usual (you can add to text or a button), then click the lightning strike and select your link action.


And voila!
Your link actions are set up on Flodesk!
Now all you need to do is decide if you’d like to send a specific email to a segment, or remove a segment from the sending list of an email or workflow etc.
As you can see, the possibilities are (almost!) endless & most importantly you’re giving your audience a better experience - which at the end of the day is what it’s all about!
Oh & if you haven’t tried Flodesk yet - click here to grab a free trial andd 50% off your first year of Flodesk!

