Want a Squarespace blog with sidebar? Here's how on Squarespace 7.1
I love Squarespace. I mean I love it, really and truly. And I’m a lover of blogging on Squarespace too, but Squarespace has a big failing where it comes to their blogging functionality… the sidebar. There isn't (at least at the time of writing) one. And it’s annoying.
Luckily there’s a quick and easy hack to creating a sidebar for your Squarespace blog, and it’s doable in less than 20 minutes (I know because I did it myself!) Here are all of the steps to follow, plus a free Canva* template for your sidebar buttons (because I’m nice like that!)
This post may contain affiliate links. These are denoted by a *. If you make a purchase via one of these links I may get a small kickback. I only recommend products and services I use and love myself! Thanks in advance :)
Step 1 - Create your blog sidebar buttons
Create your buttons using one of these free Canva templates.
NB: The Pill and Leaf shaped buttons are created from multiple shapes to make them sharable & editable on Canva, so you will need to change the colour of all 3 parts of the shape
I recommend you have 3-5 buttons taking people to pages such as your about page, your services page and your lead generator (AKA freebie or email list sign up)
Style them to look like your website buttons and use your brand colour and fonts. I recommend styling your last button to be a different colour to the rest so it stands out - and setting this to be your primary/ preferred call to action such as your lead generator or contact me option.
Use this template to create your circular profile pic.
Once again same deal - if you have Canva pro export as transparent PNG, if not, set the background colour to the same as your blog page background and export as JPeg - it’ll blend in.
Step 2 - Export your blog sidebar buttons
If you are using a rectangular shape you can export them as Jpegs. If you’re using a pill, leaf or any other shape, export them as PNGs with a transparent background (you’ll require canva pro for a transparent background - your other choice is to set the background colour to the same as your website background and it will blend in (then export as Jpeg)! Whichever file type you export as, ensure they’re set to 1500px width.
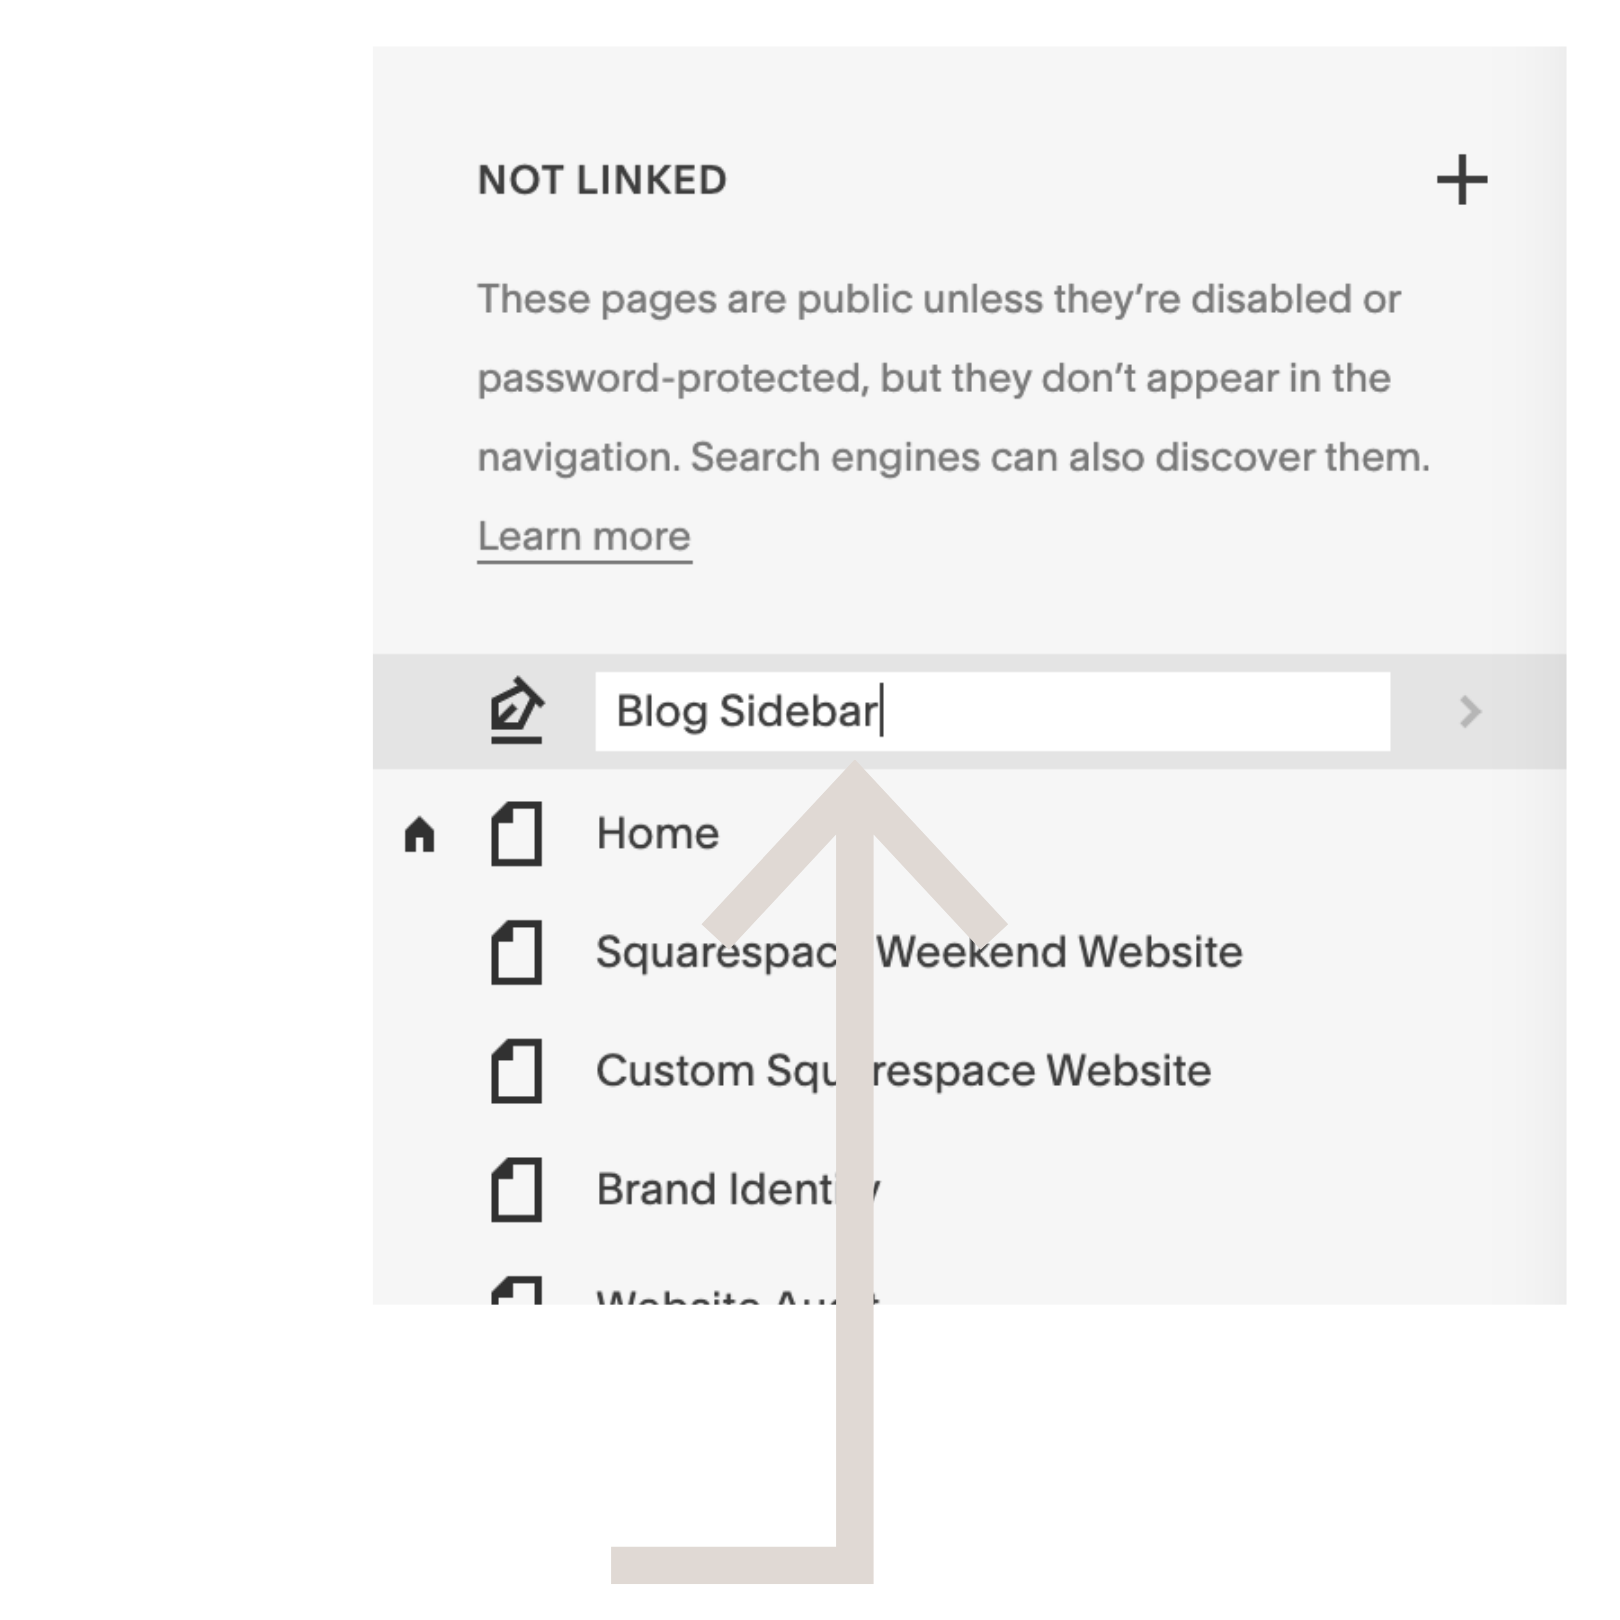
Step 3 - create a new blog collection on Squarespace
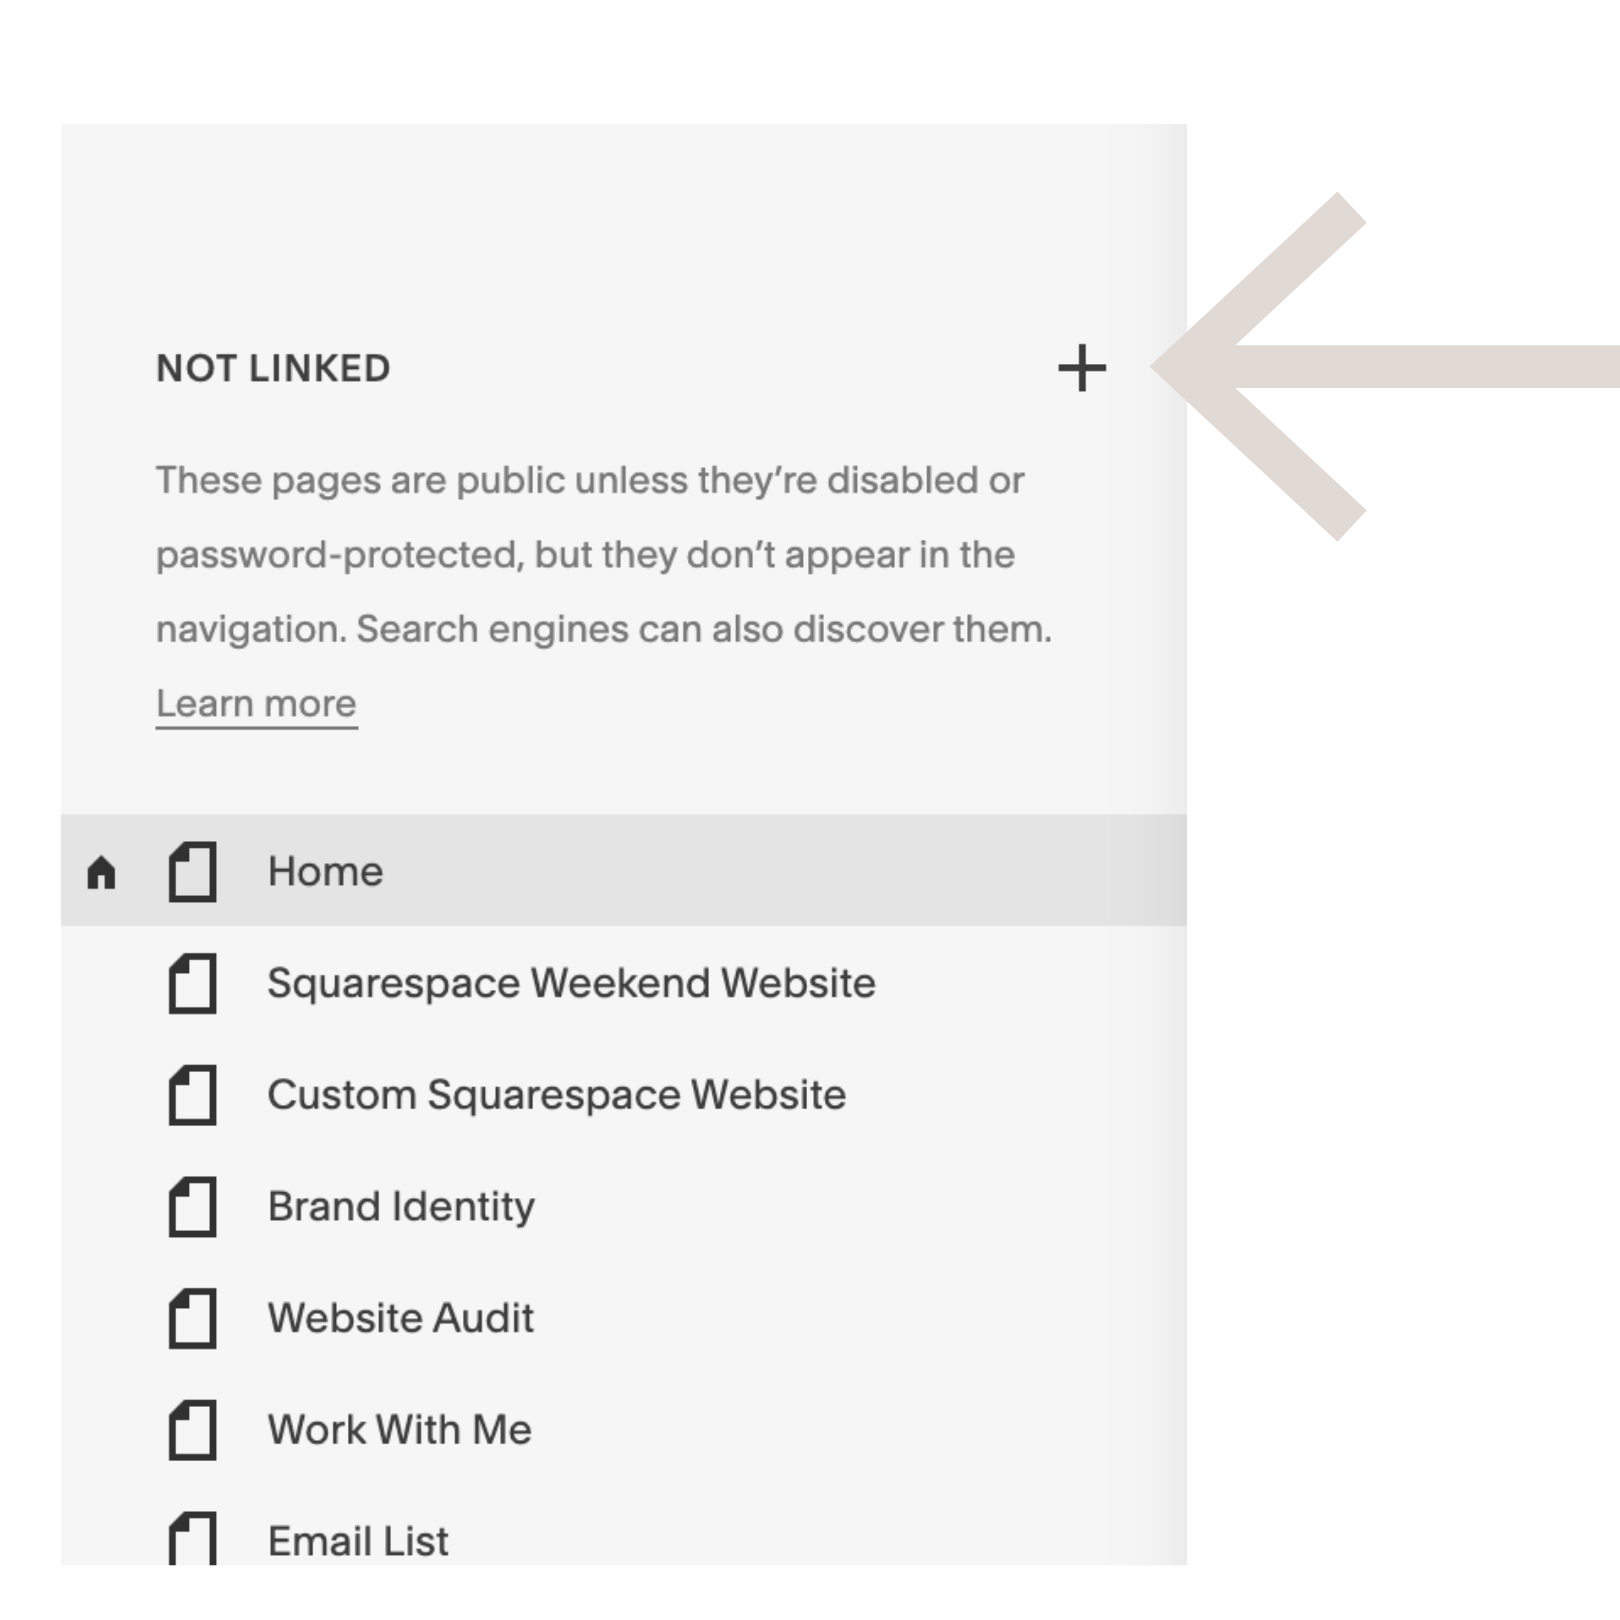
Create a new blog collection on Squarespace in the unlinked section. Call it “Blog sidebar”.
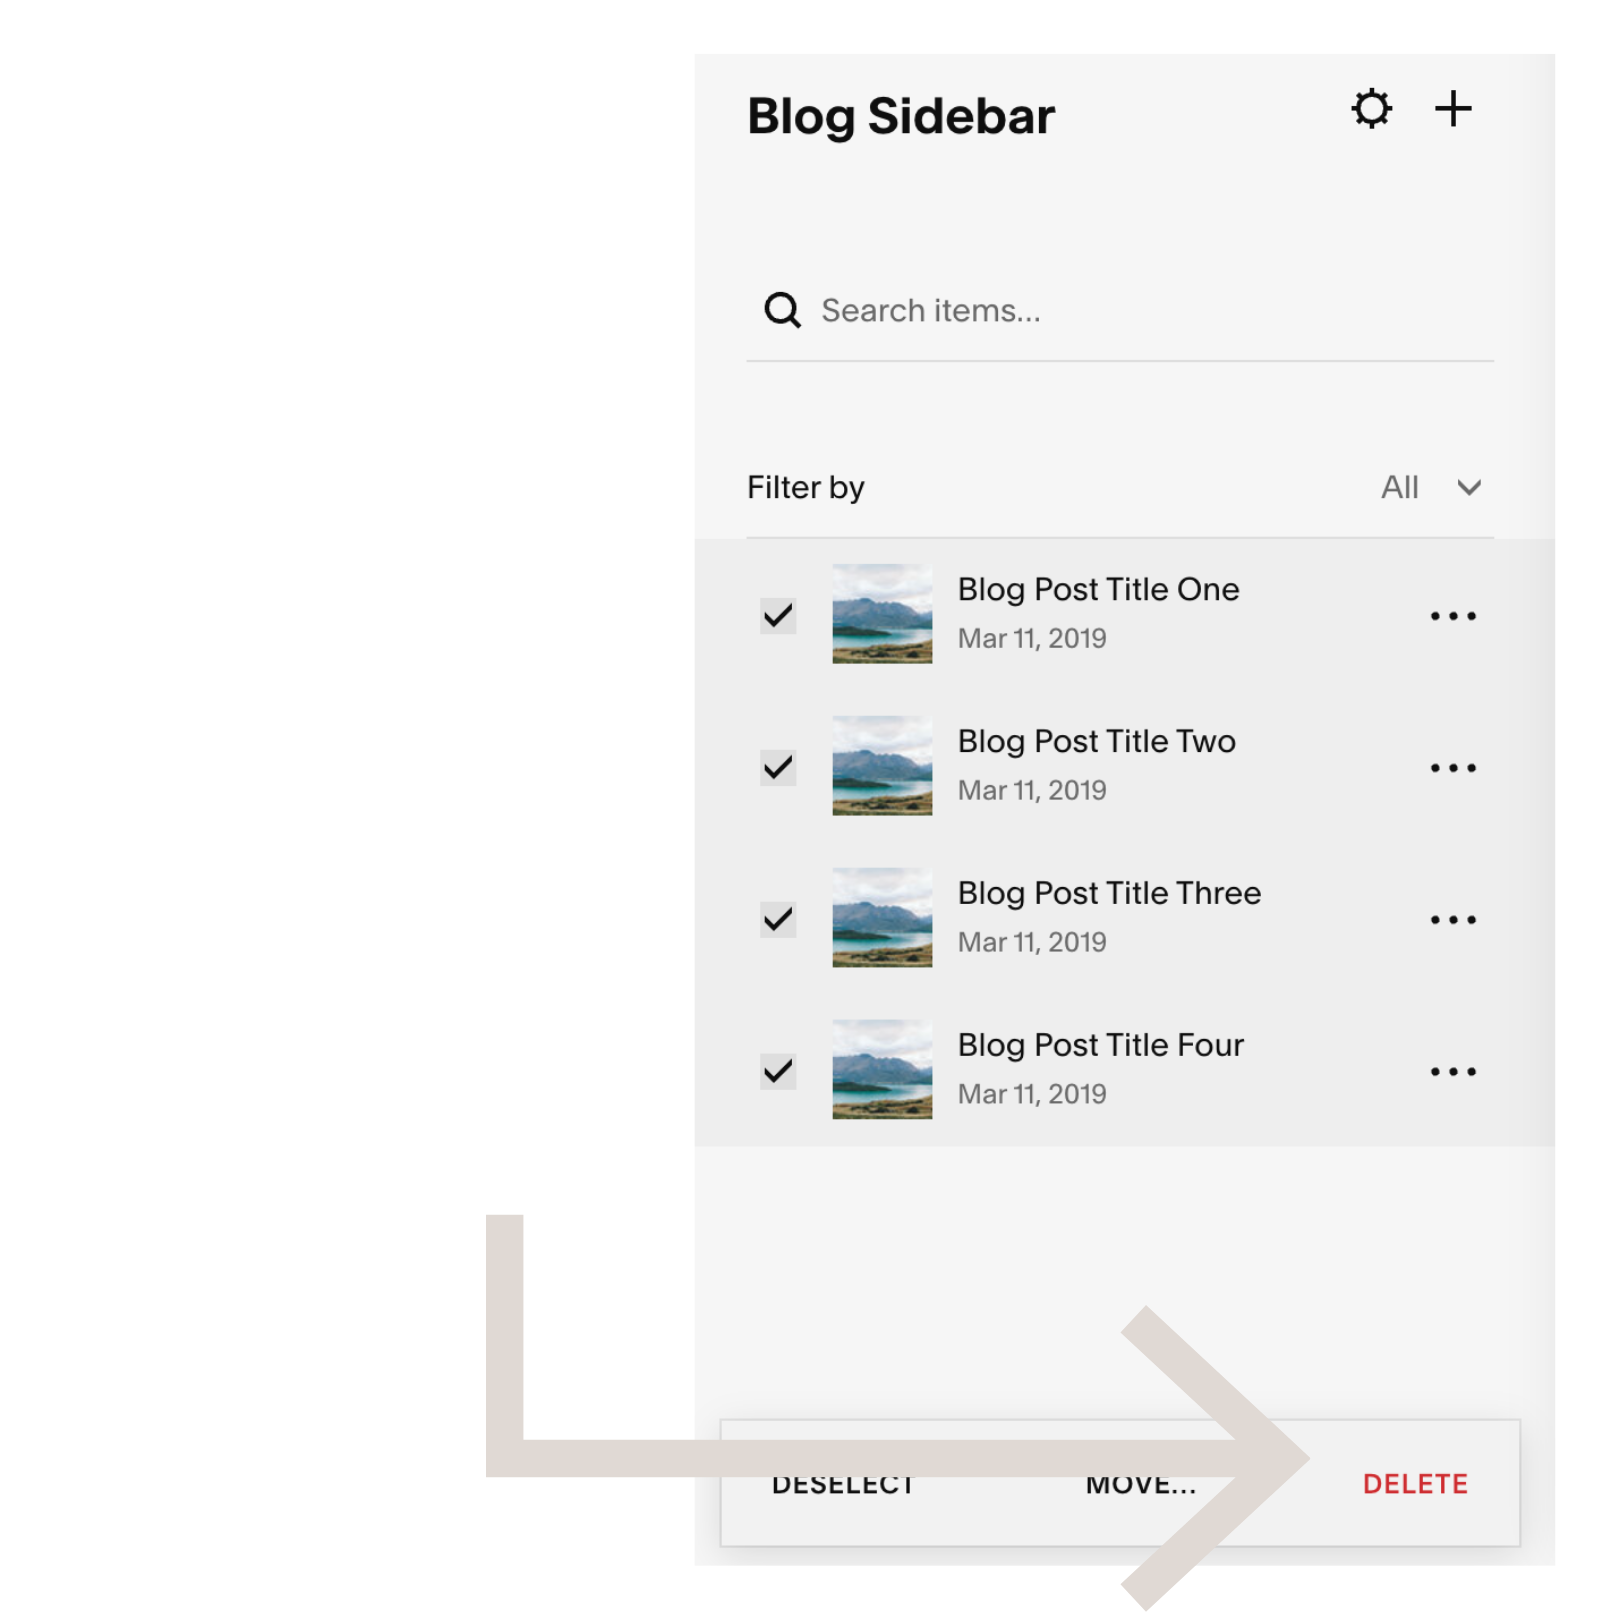
Step 4 - set up your Squarespace blog sidebar source content
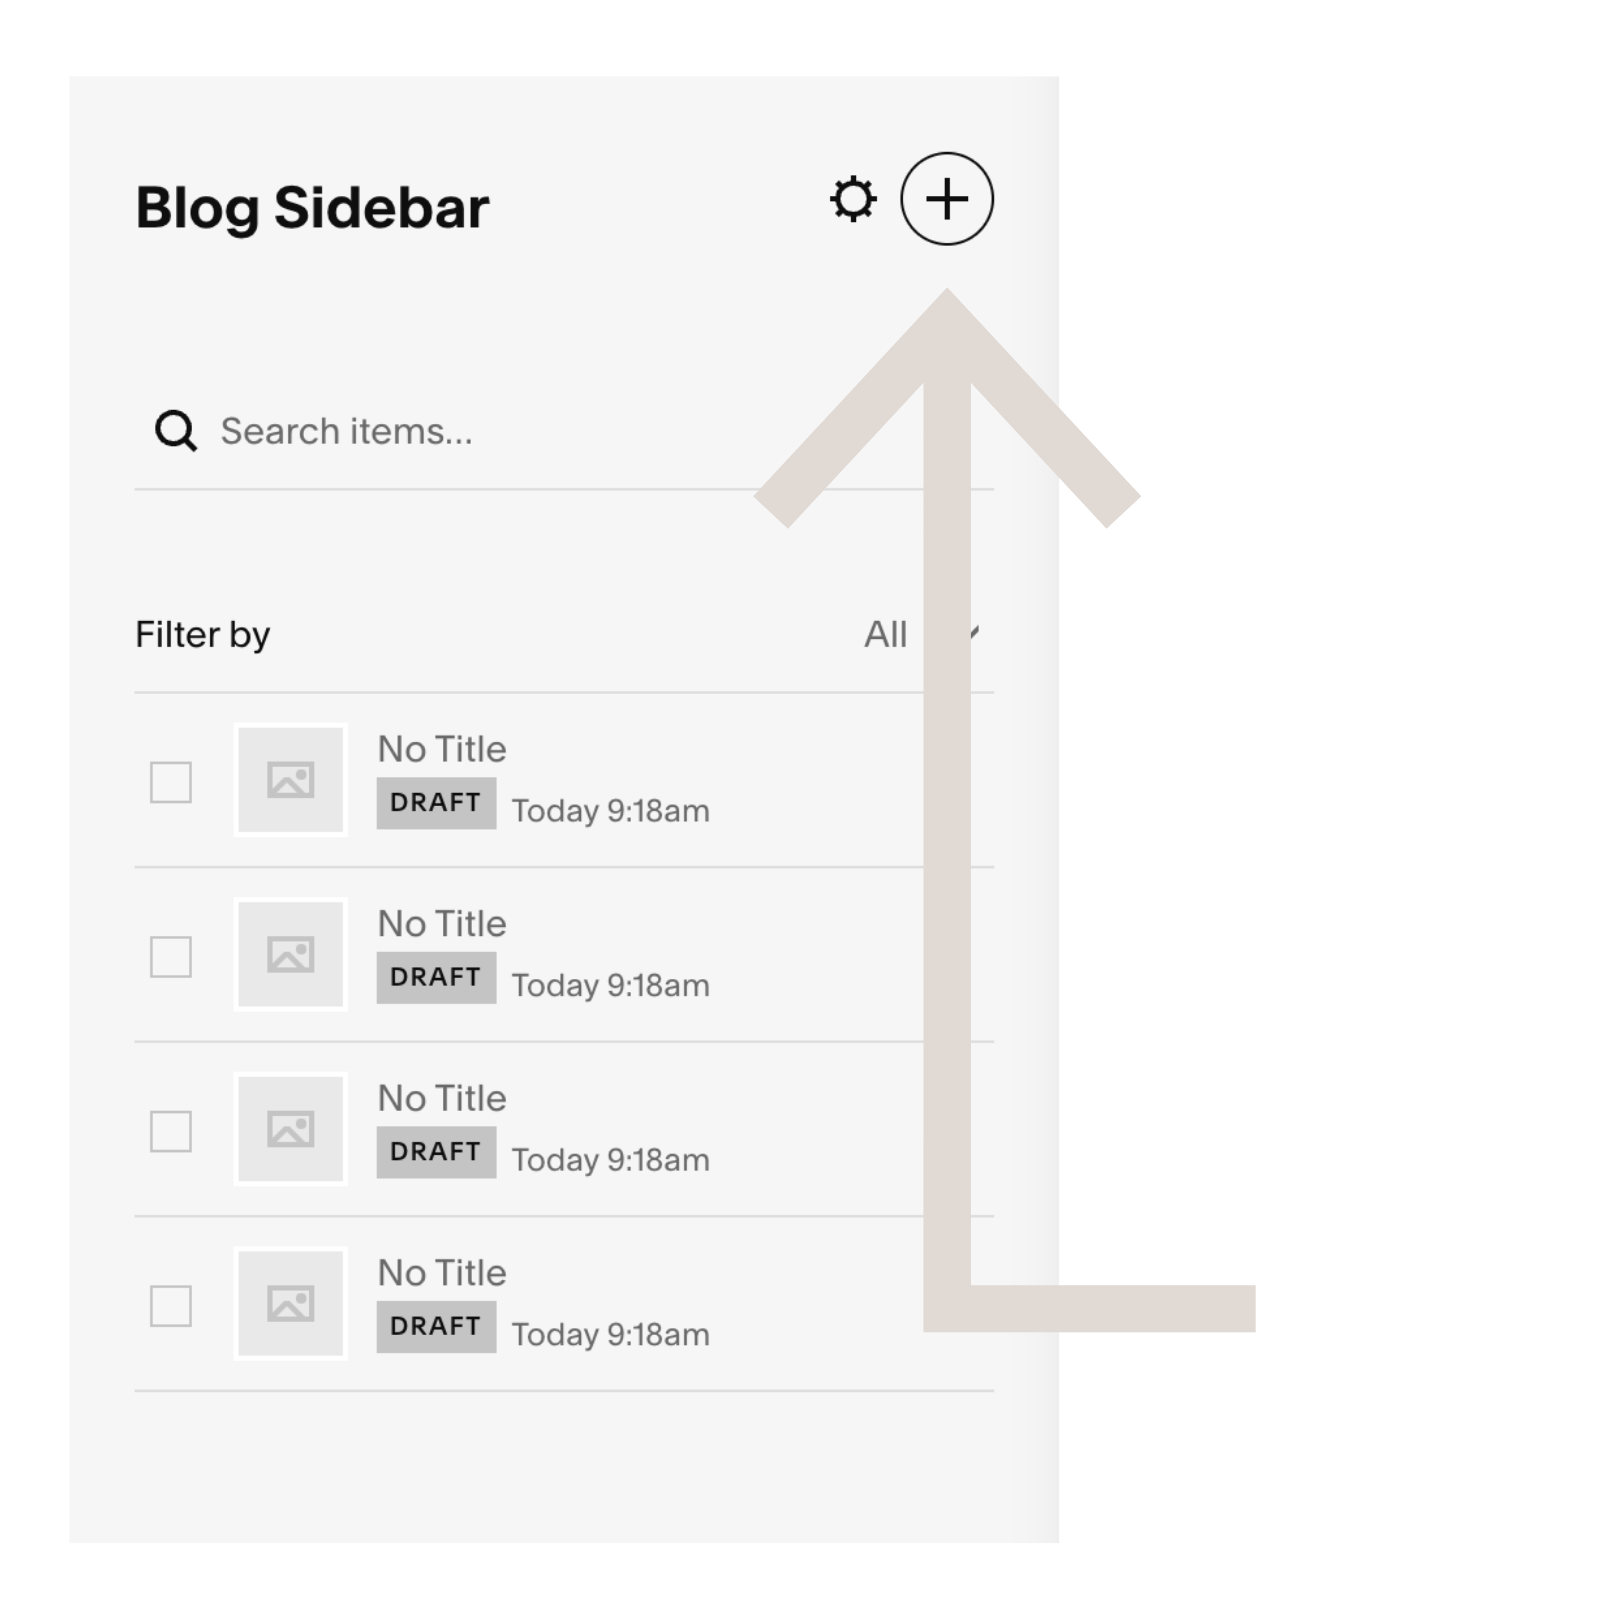
Delete the sample blog posts, and add as many new ones as you need for the items in your blog sidebar (an image of yourself plus the number of buttons you created in step 1)
diying your squarespace site? i’ve got you covered with these blogs


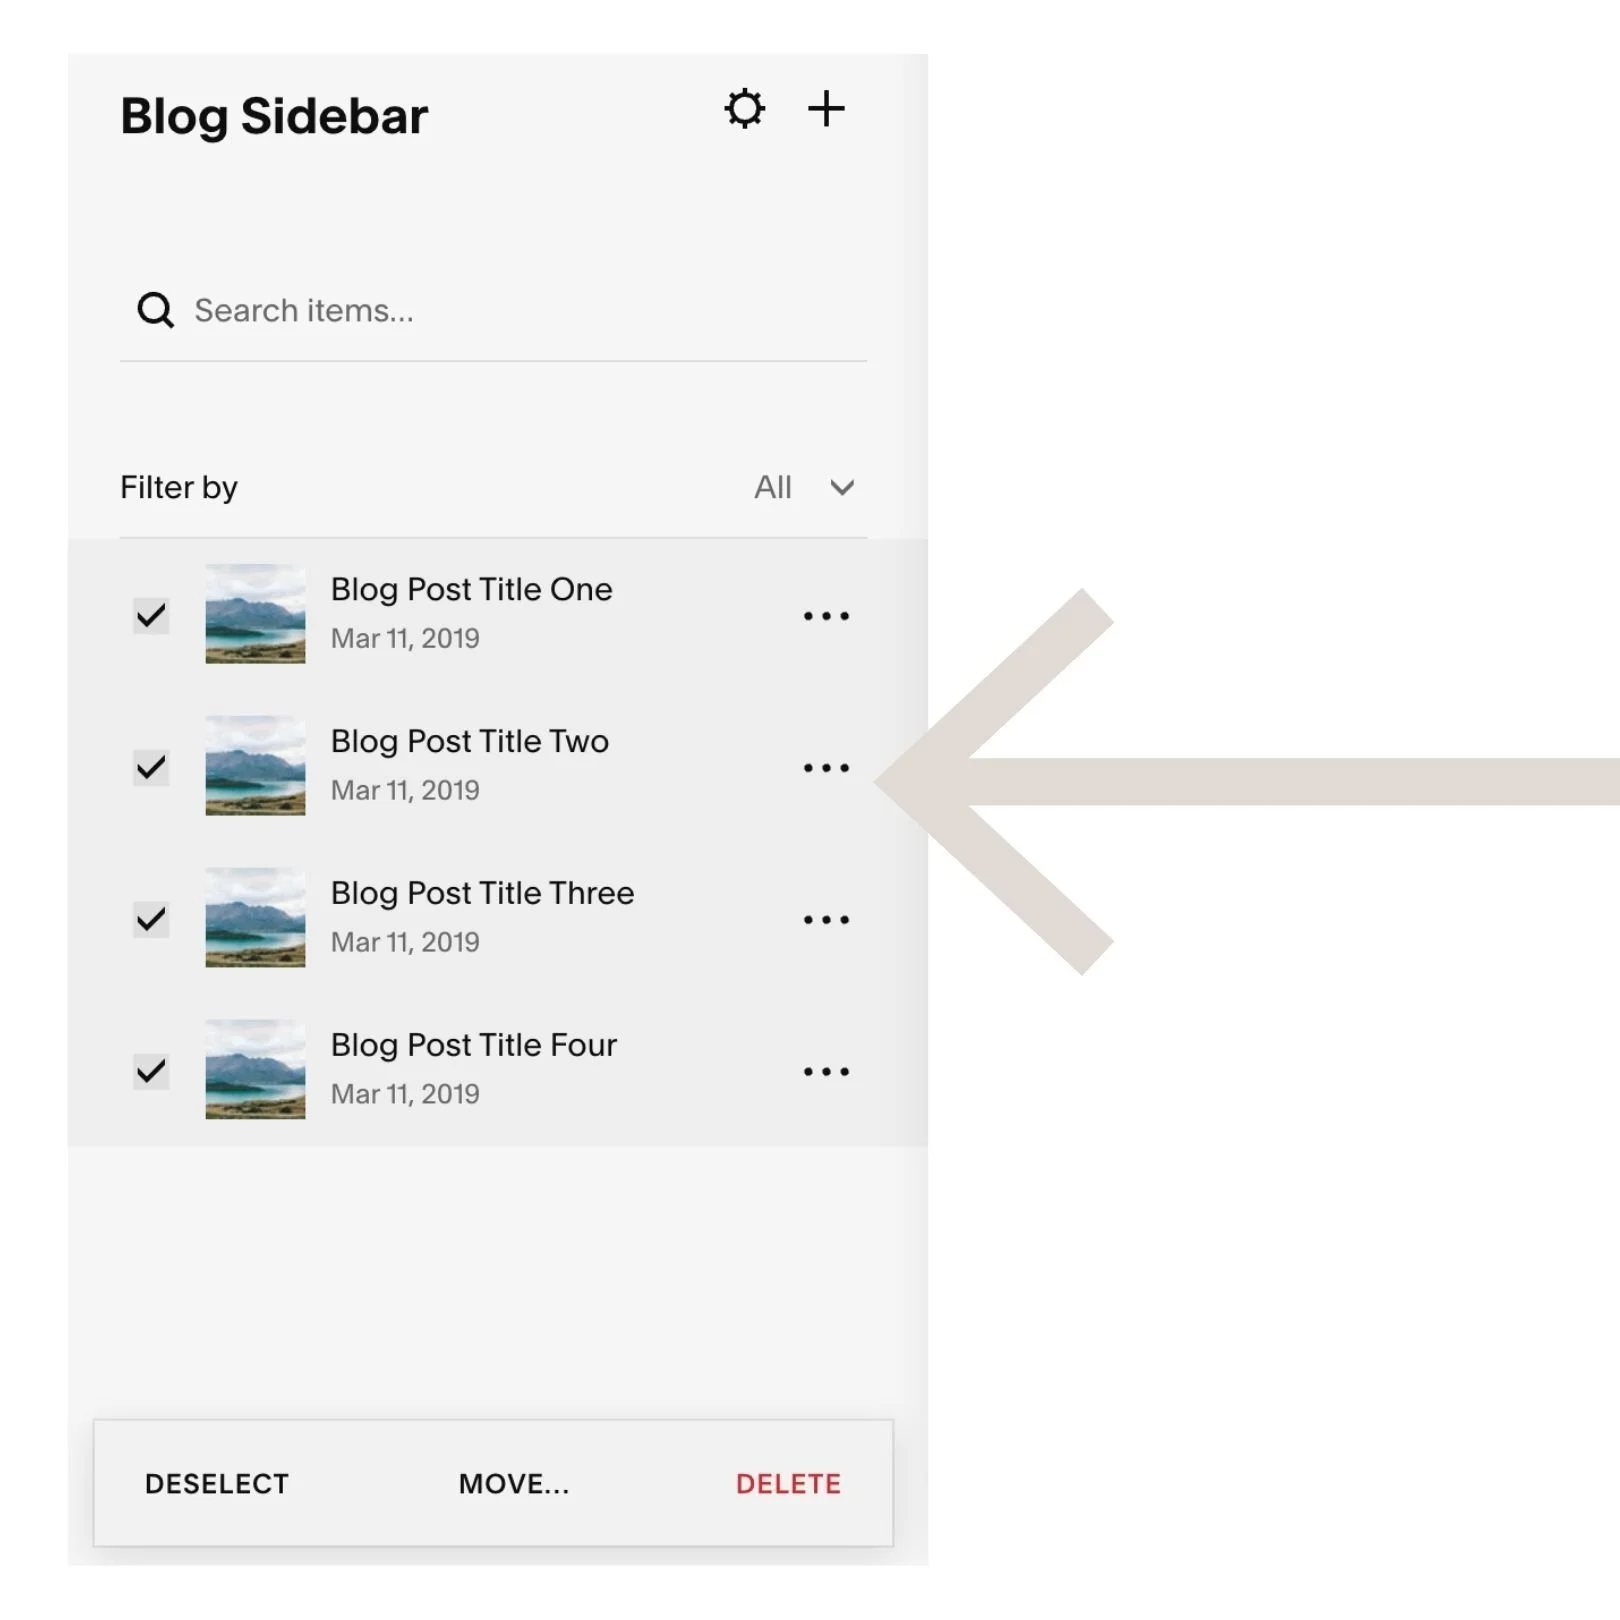
Step 5 - Set up your blog sidebar thumbnails
In the newest (top) post, click on the 3 dots on the right hand side to go to settings.
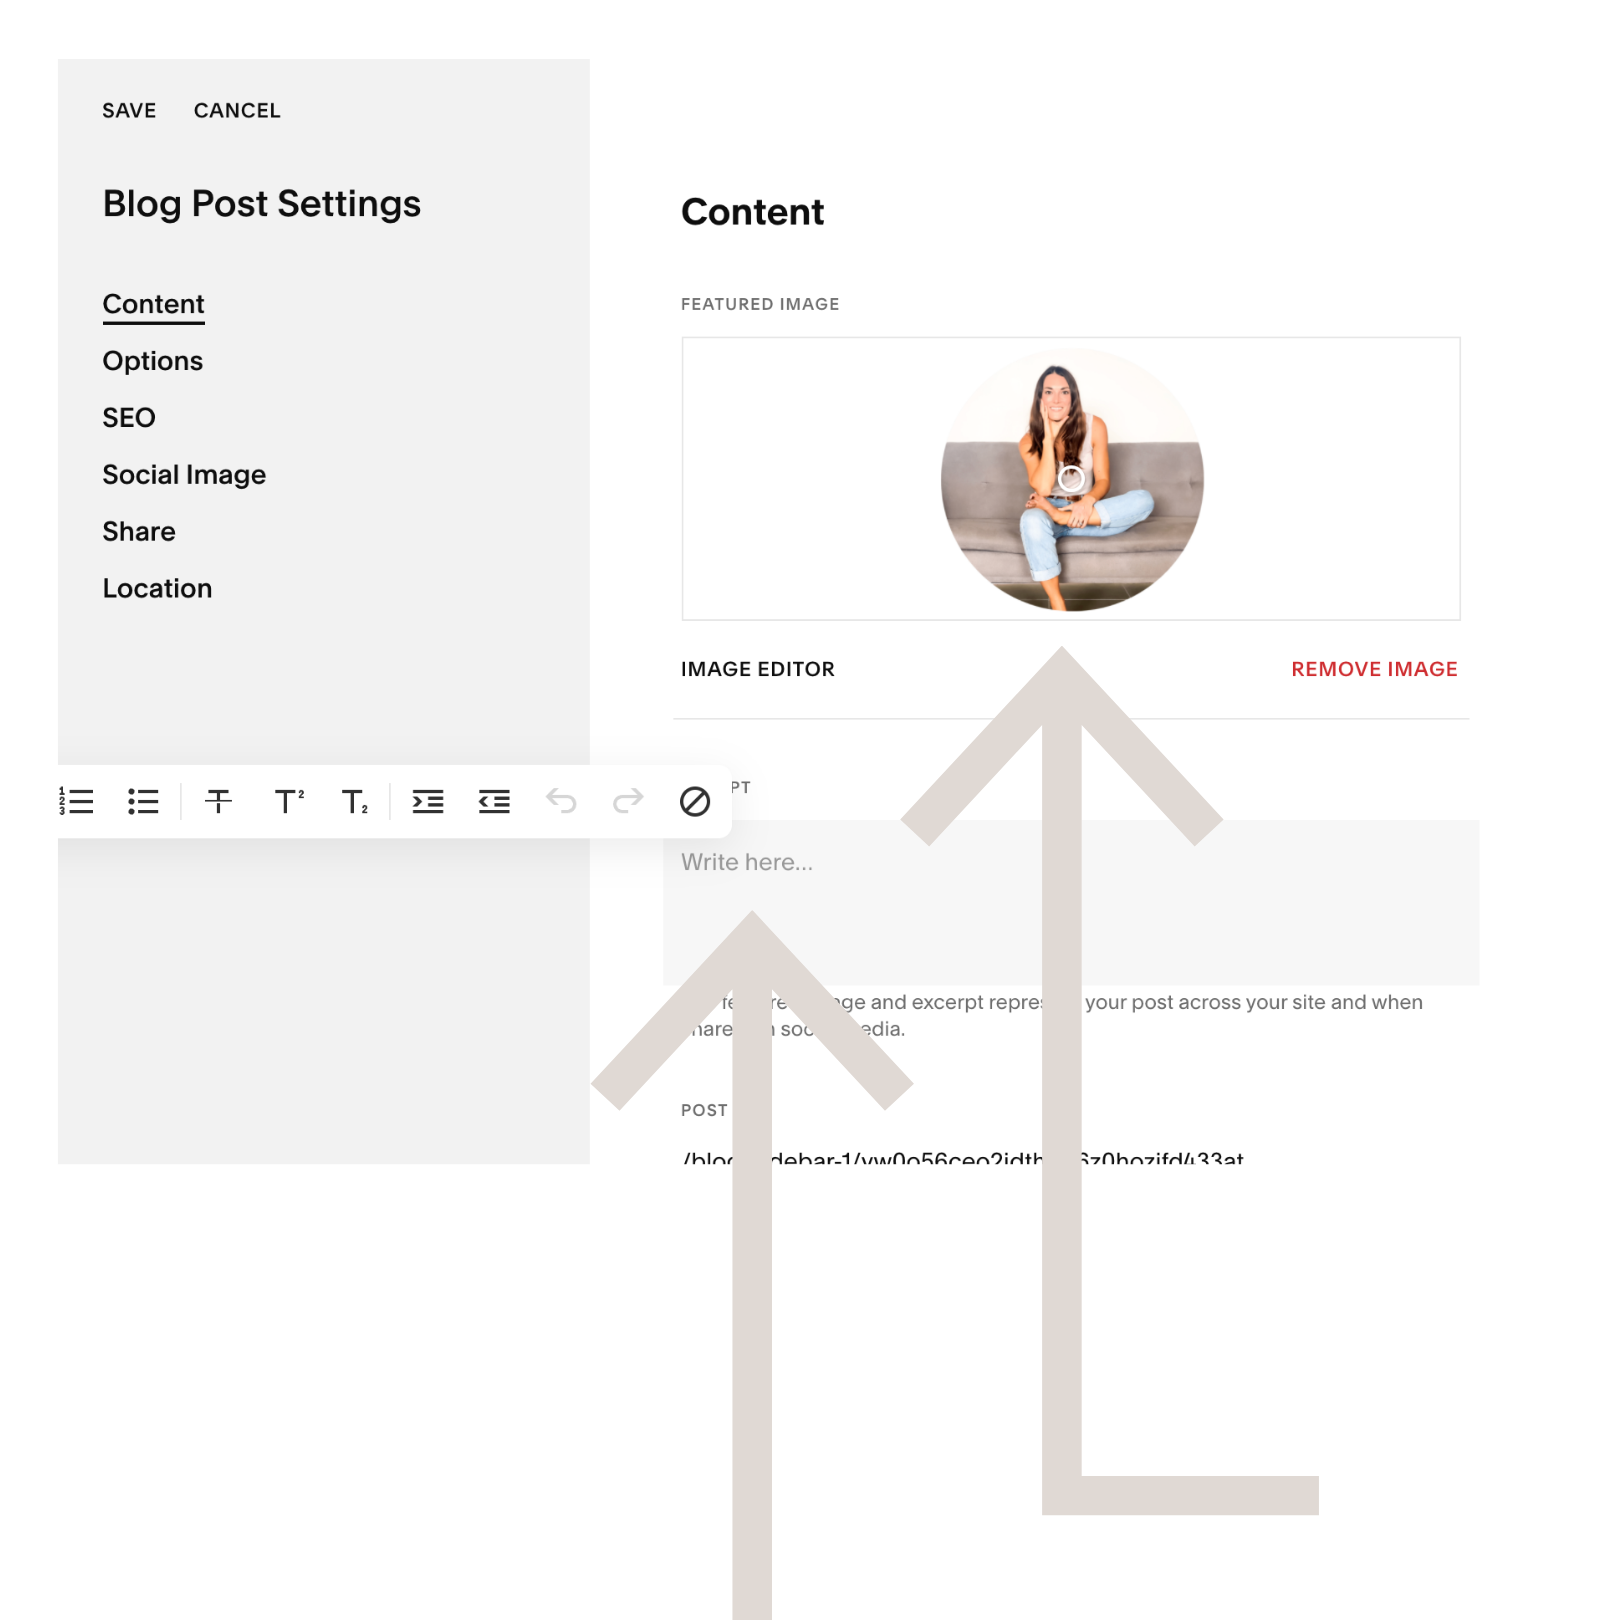
Click on the Content tab and add a circular picture of yourself as the thumbnail (use this template if you need).
If you’d like to show a brief (one sentence) bio below your thumbnail image add this to the excerpt box.
Step 6 - Amend the source urls and set to link post to source url
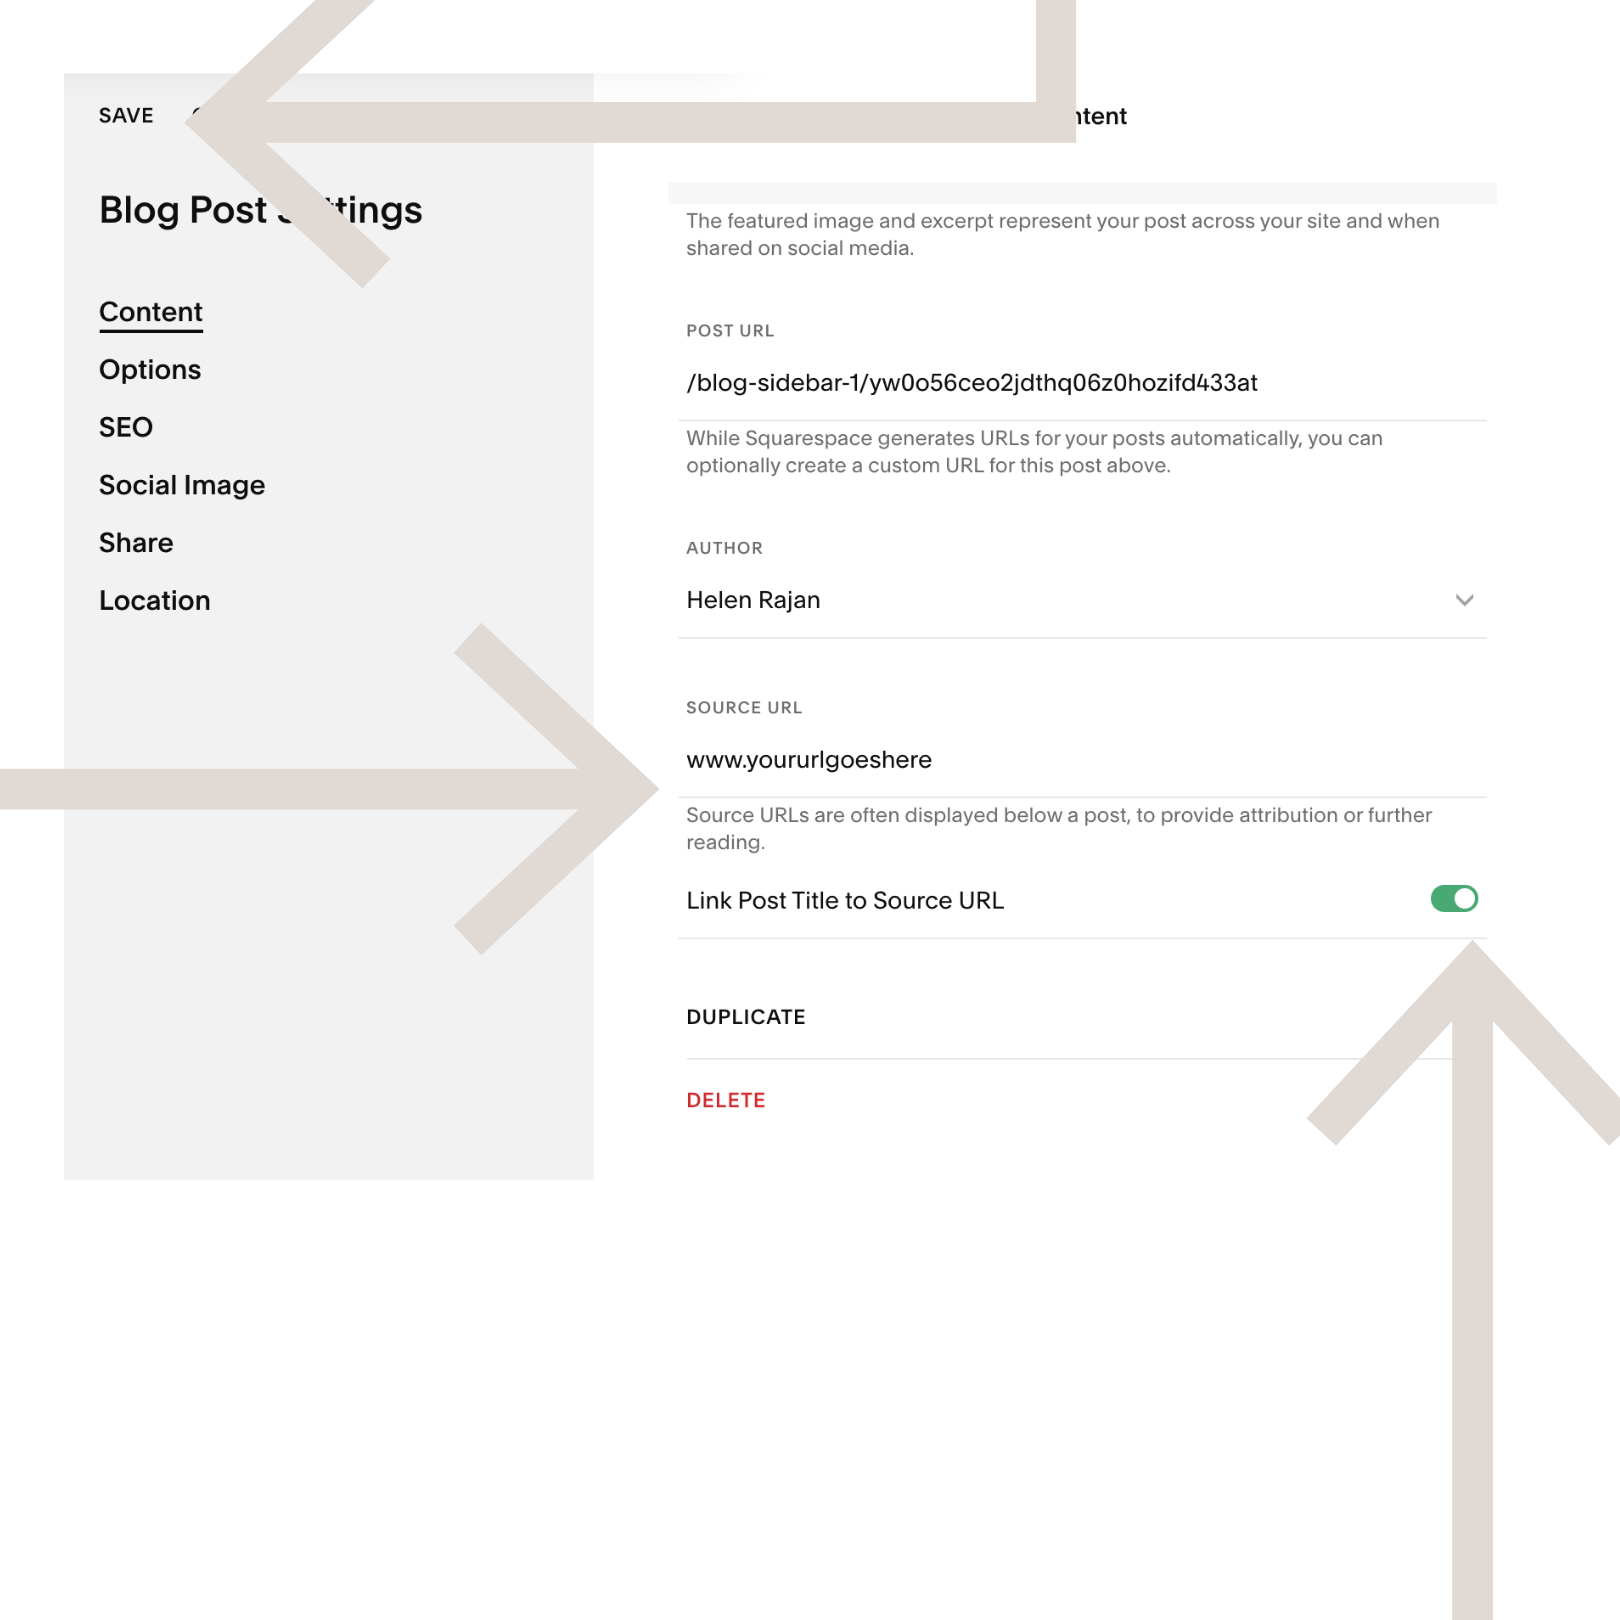
Add the url you’d like the button/ profile pic to click to in “Source URL”
Toggle on Link Post to Source URL.
Click Save.
Still in the newest (top) post “Settings” under the “Content” tab. Change the “source url” to whatever page you’d like to click through to if people click on your image thumbnail (I suggest your about page, but your home page could work too).
Toggle “on” the “Link Post Title to Source URL option”. This means when someone clicks on your blog thumbnail (in this case your button) they will go to whatever url you added to the source url field as opposed to the “blog post” which of course doesn’t exist.
Click Save.
Step 7 - Repeat set up for all sidebar buttons
Repeat steps 5 and 6 for your buttons, adding the appropriate url to the “Source URL” field.
Do not add an excerpt for these (we don’t want any text under our buttons).
Remember to do these in order top to bottom as you’d like them to show in your sidebar. Click save after each one.
Step 8 - Set up a blog, or navigate to your existing blog (where you’d like your sidebar to live)
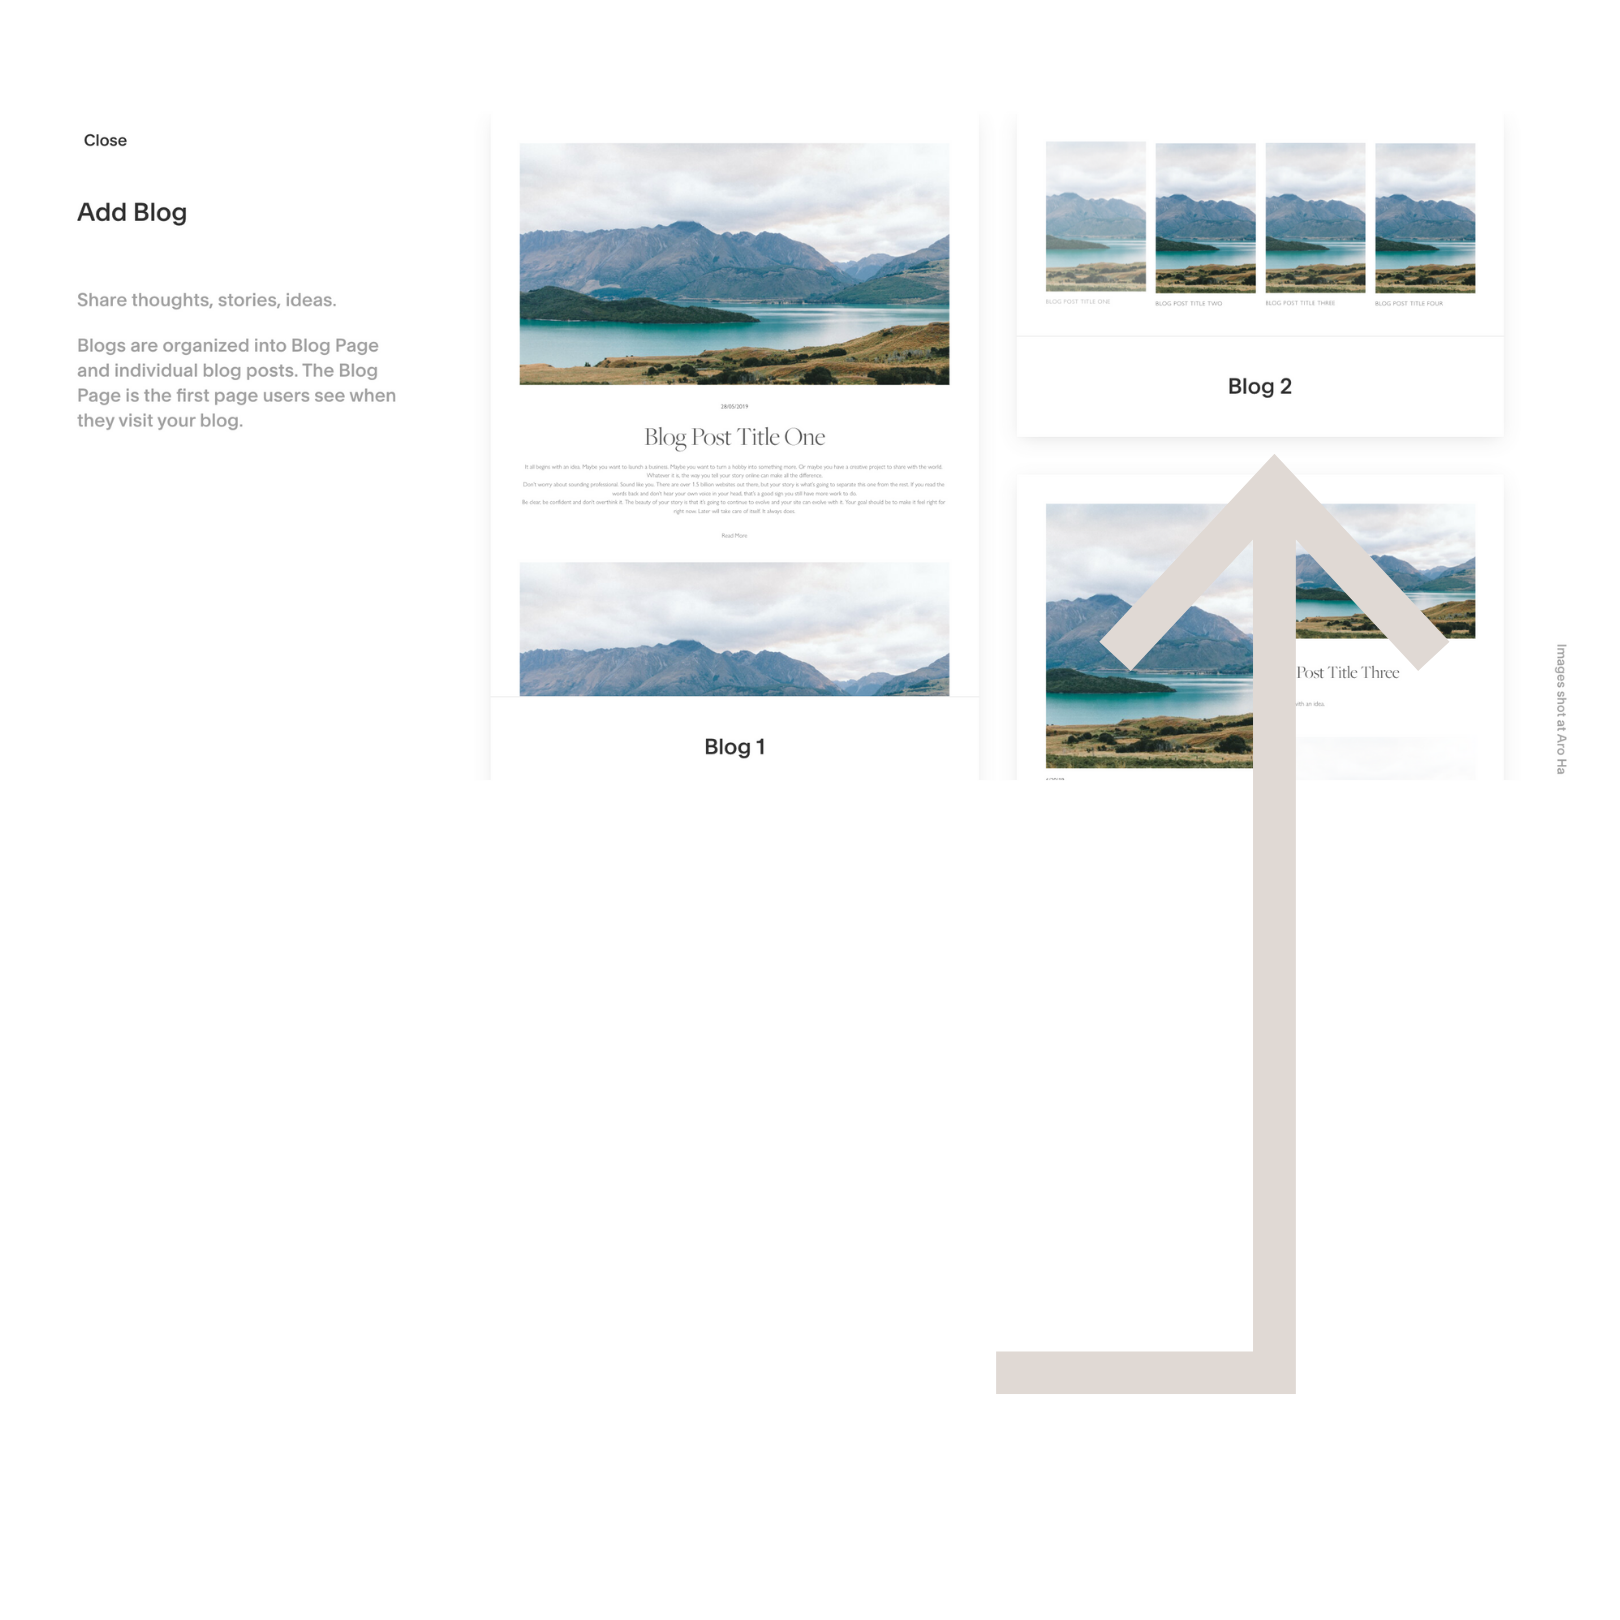
If you don’t yet have a blog set up on your Squarespace site (Why not?! - here’s 5 reasons to get started today!) , add a new blog collection (in your main navigation section if you’d like it to show up in your nav bar, or in unlinked if you’d prefer to link to it elsewhere).
If you already have a blog set up on your Squarespace site, navigate over to the blog.
We are now going to add your sidebar to your blog post (note if you already have a blog set up, you will need to go into all past posts and repeat this process, if your blog is new, we’re going to set up a template post which you’ll be able to duplicate each time you add a new blog post meaning you only need to do this once.
Need help setting up your blog on Squarespace? I’ve got you covered.
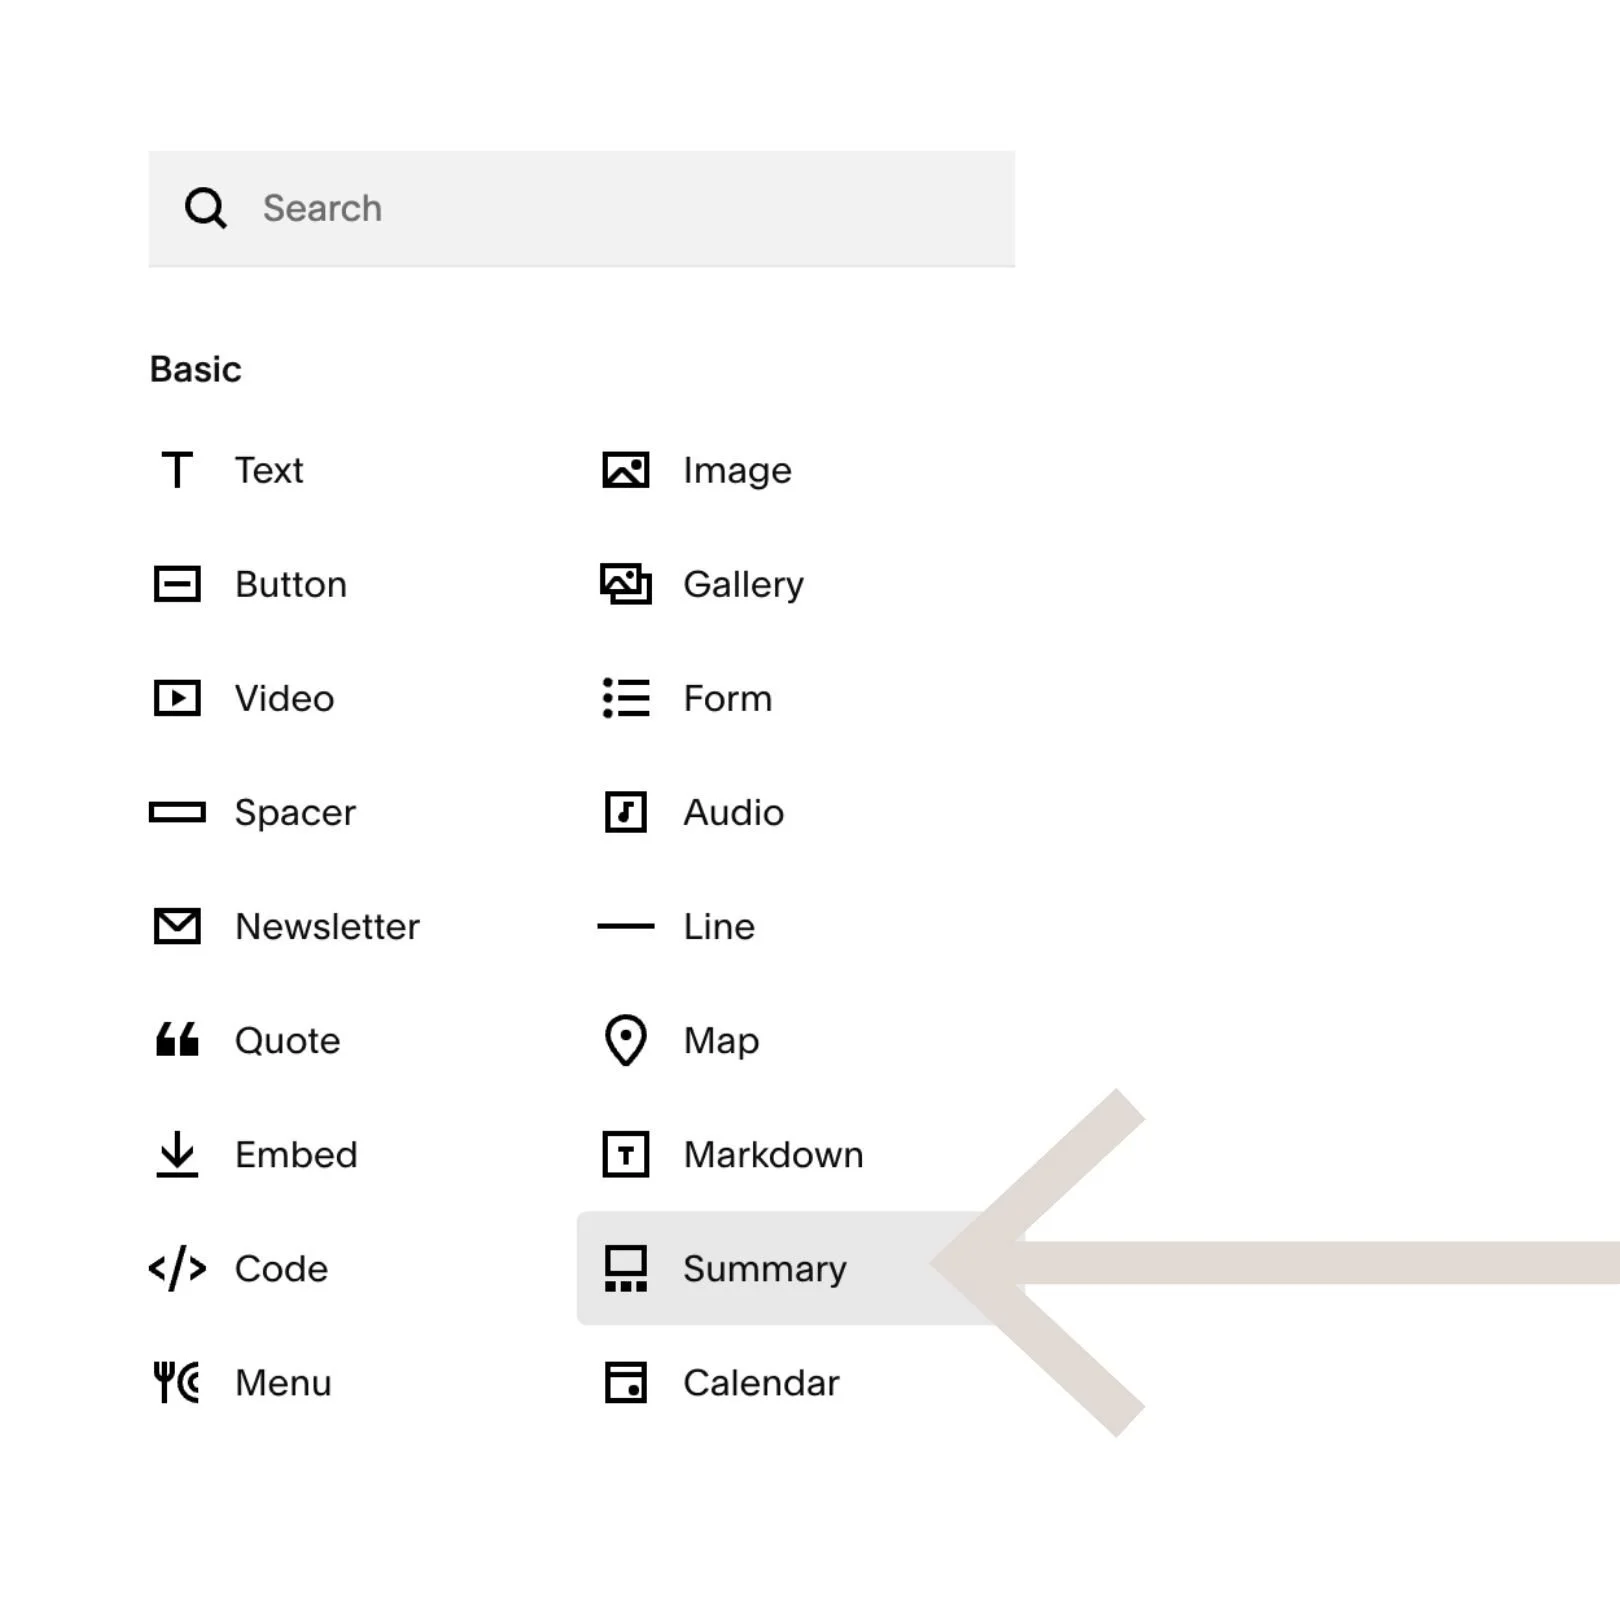
Step 9 - In a new blog post add a blog summary block
If you’ve started a new blog collection delete the sample posts and then add a new blog post. If you’re adding this to an existing blog head add a new post.
Click on the edit button on the top left hand side of your new blog post. This will open it up.
Add a summary block to the post, and then drag and drop it up to the top right hand corner so that it spans a small column space (with the automatically added text block to the left). This summary block is going to be your sidebar.
Step 10 - Edit the blog summary block content
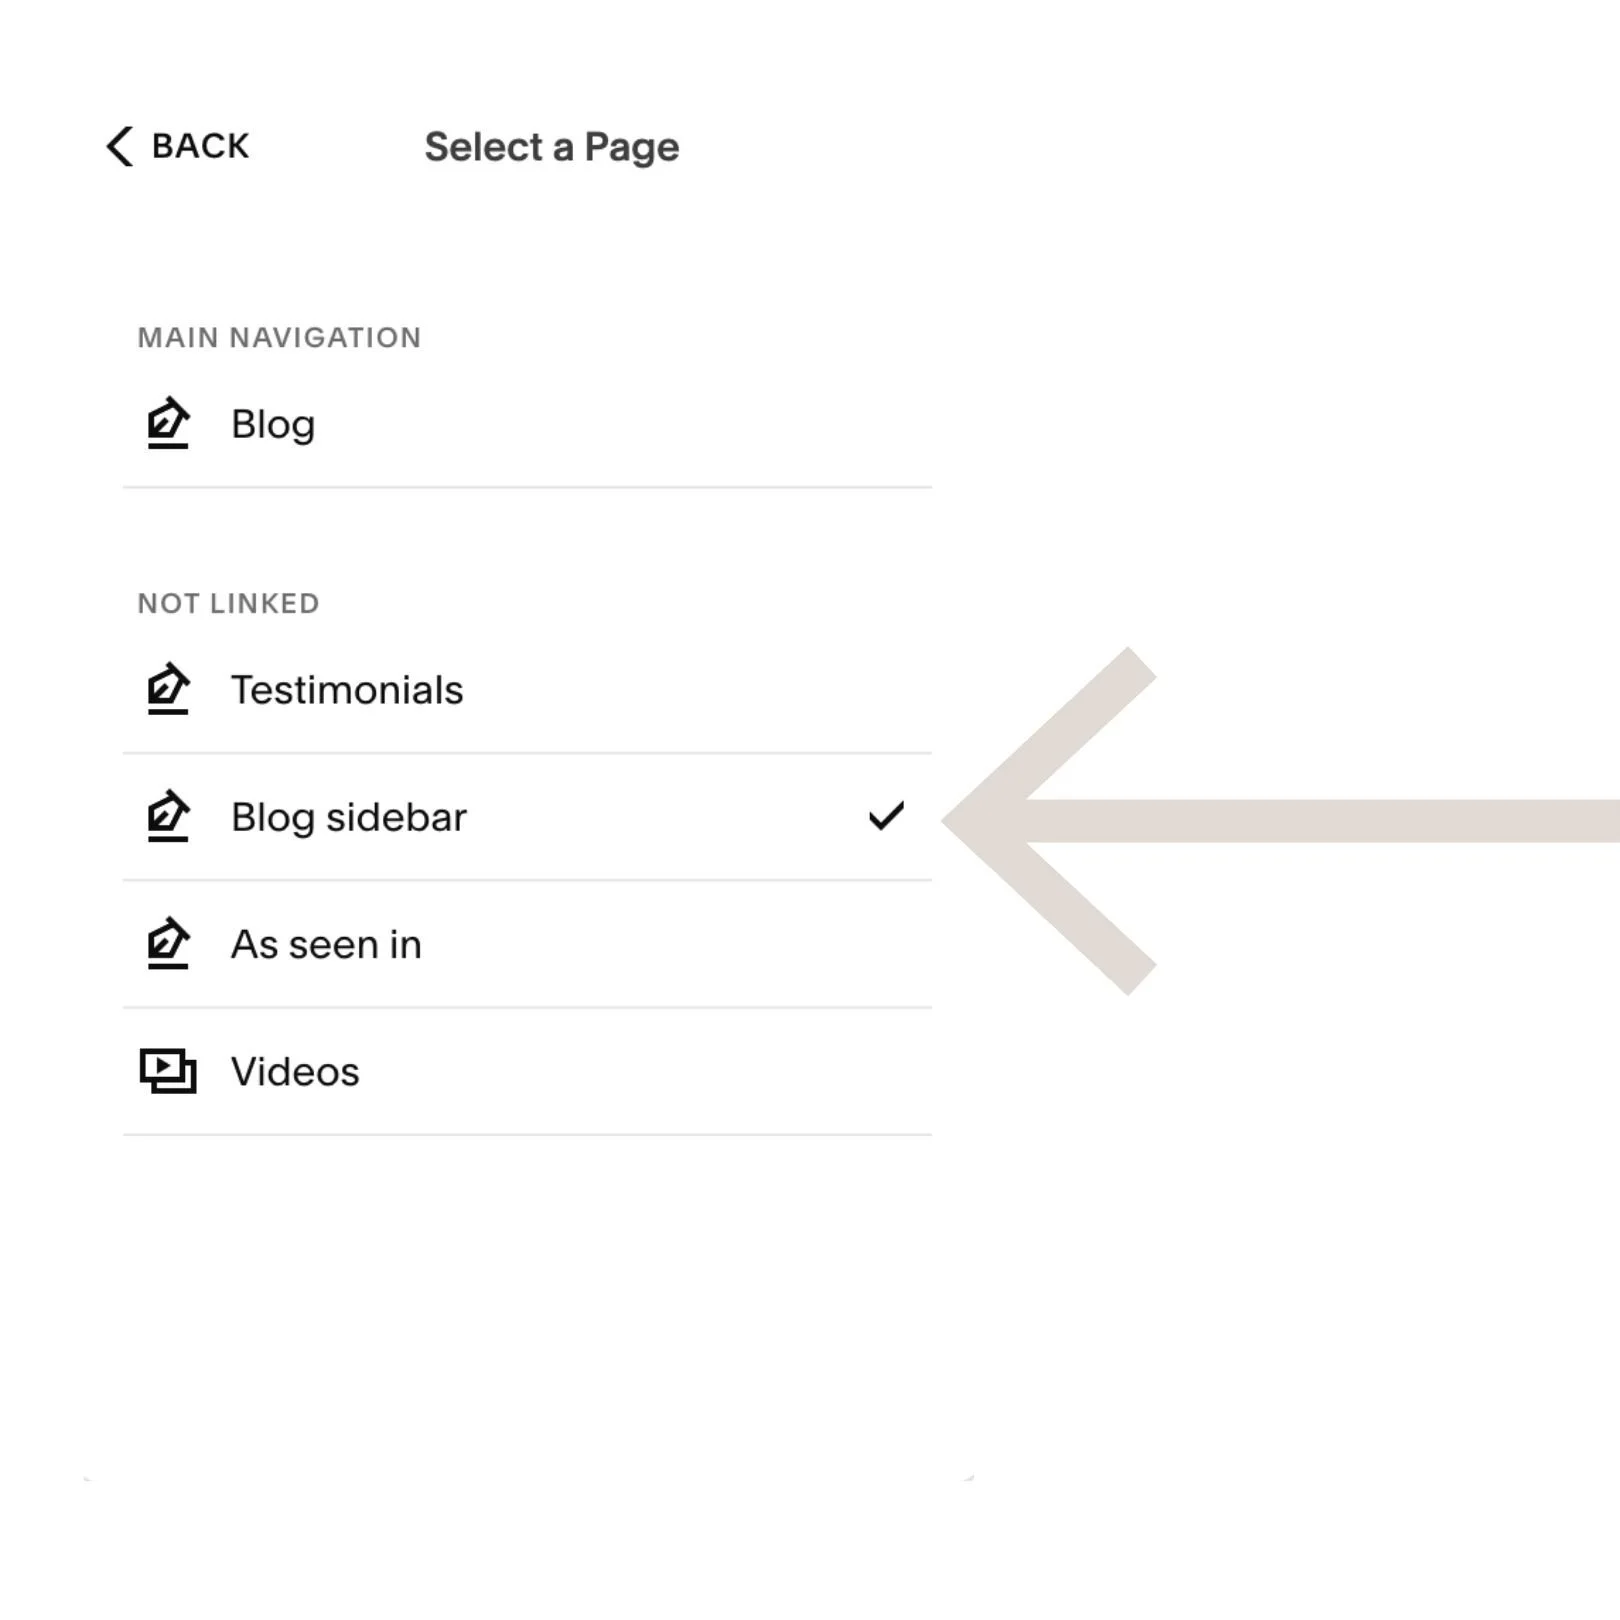
Click on the edit button for your blog summary block. In content go to select a page and choose “Blog Sidebar”.
Set Primary and Secondary meta data to “none”.
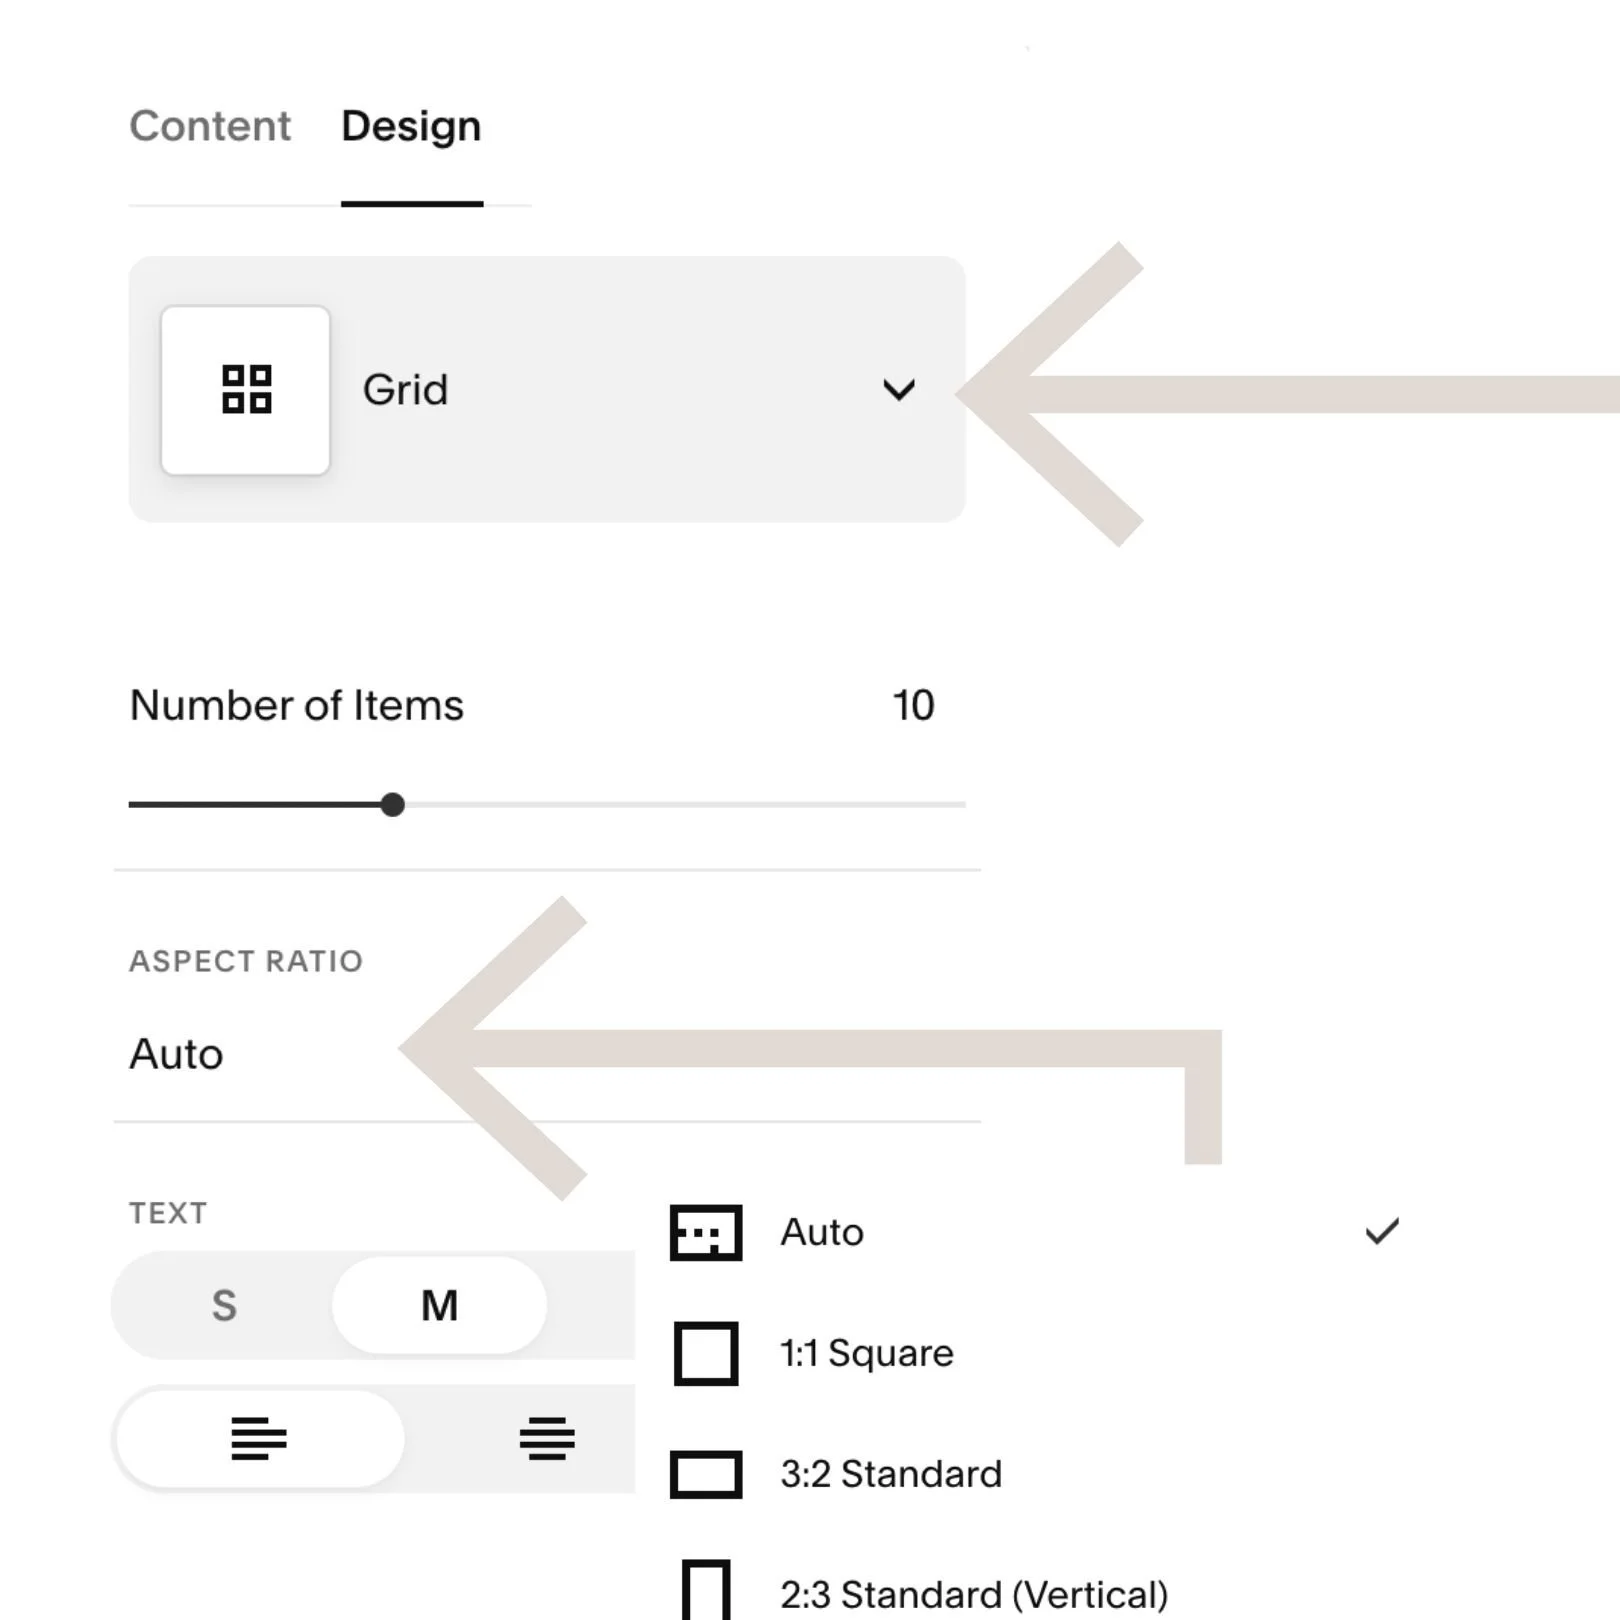
Step 11 - Edit the blog summary block design
Click on the design button at the top of your summary block settings.
Set the display to “Grid”.
The number of items to the number of buttons plus your thumbnail (for me that’s 5)
Set the aspect ratio to “Auto”
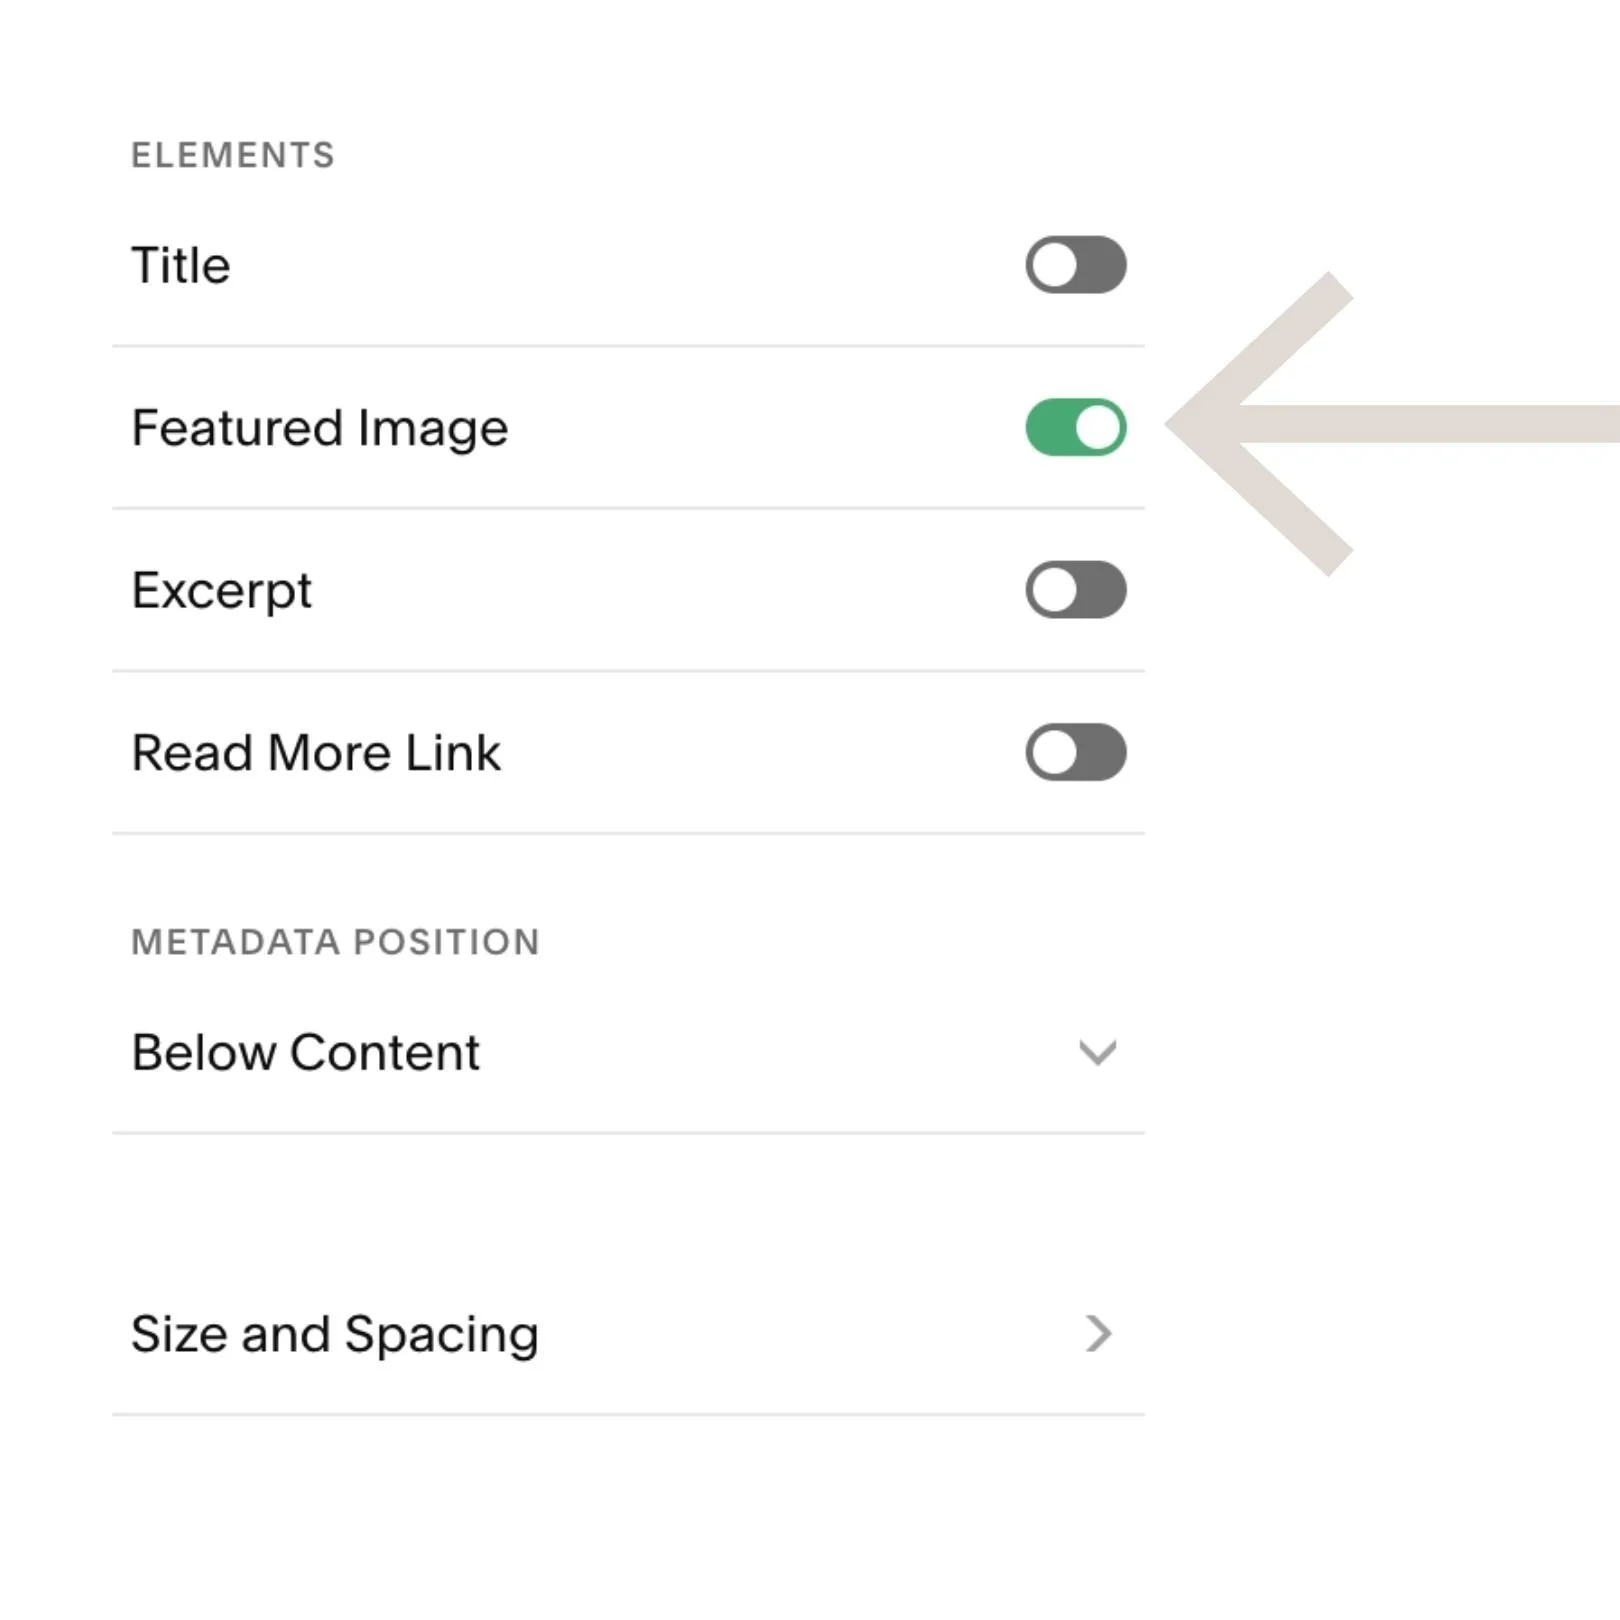
Ensure everything is toggled “Off” except for featured image (and if you wanted a little about you blurb under your thumbnail image “Excerpt”.
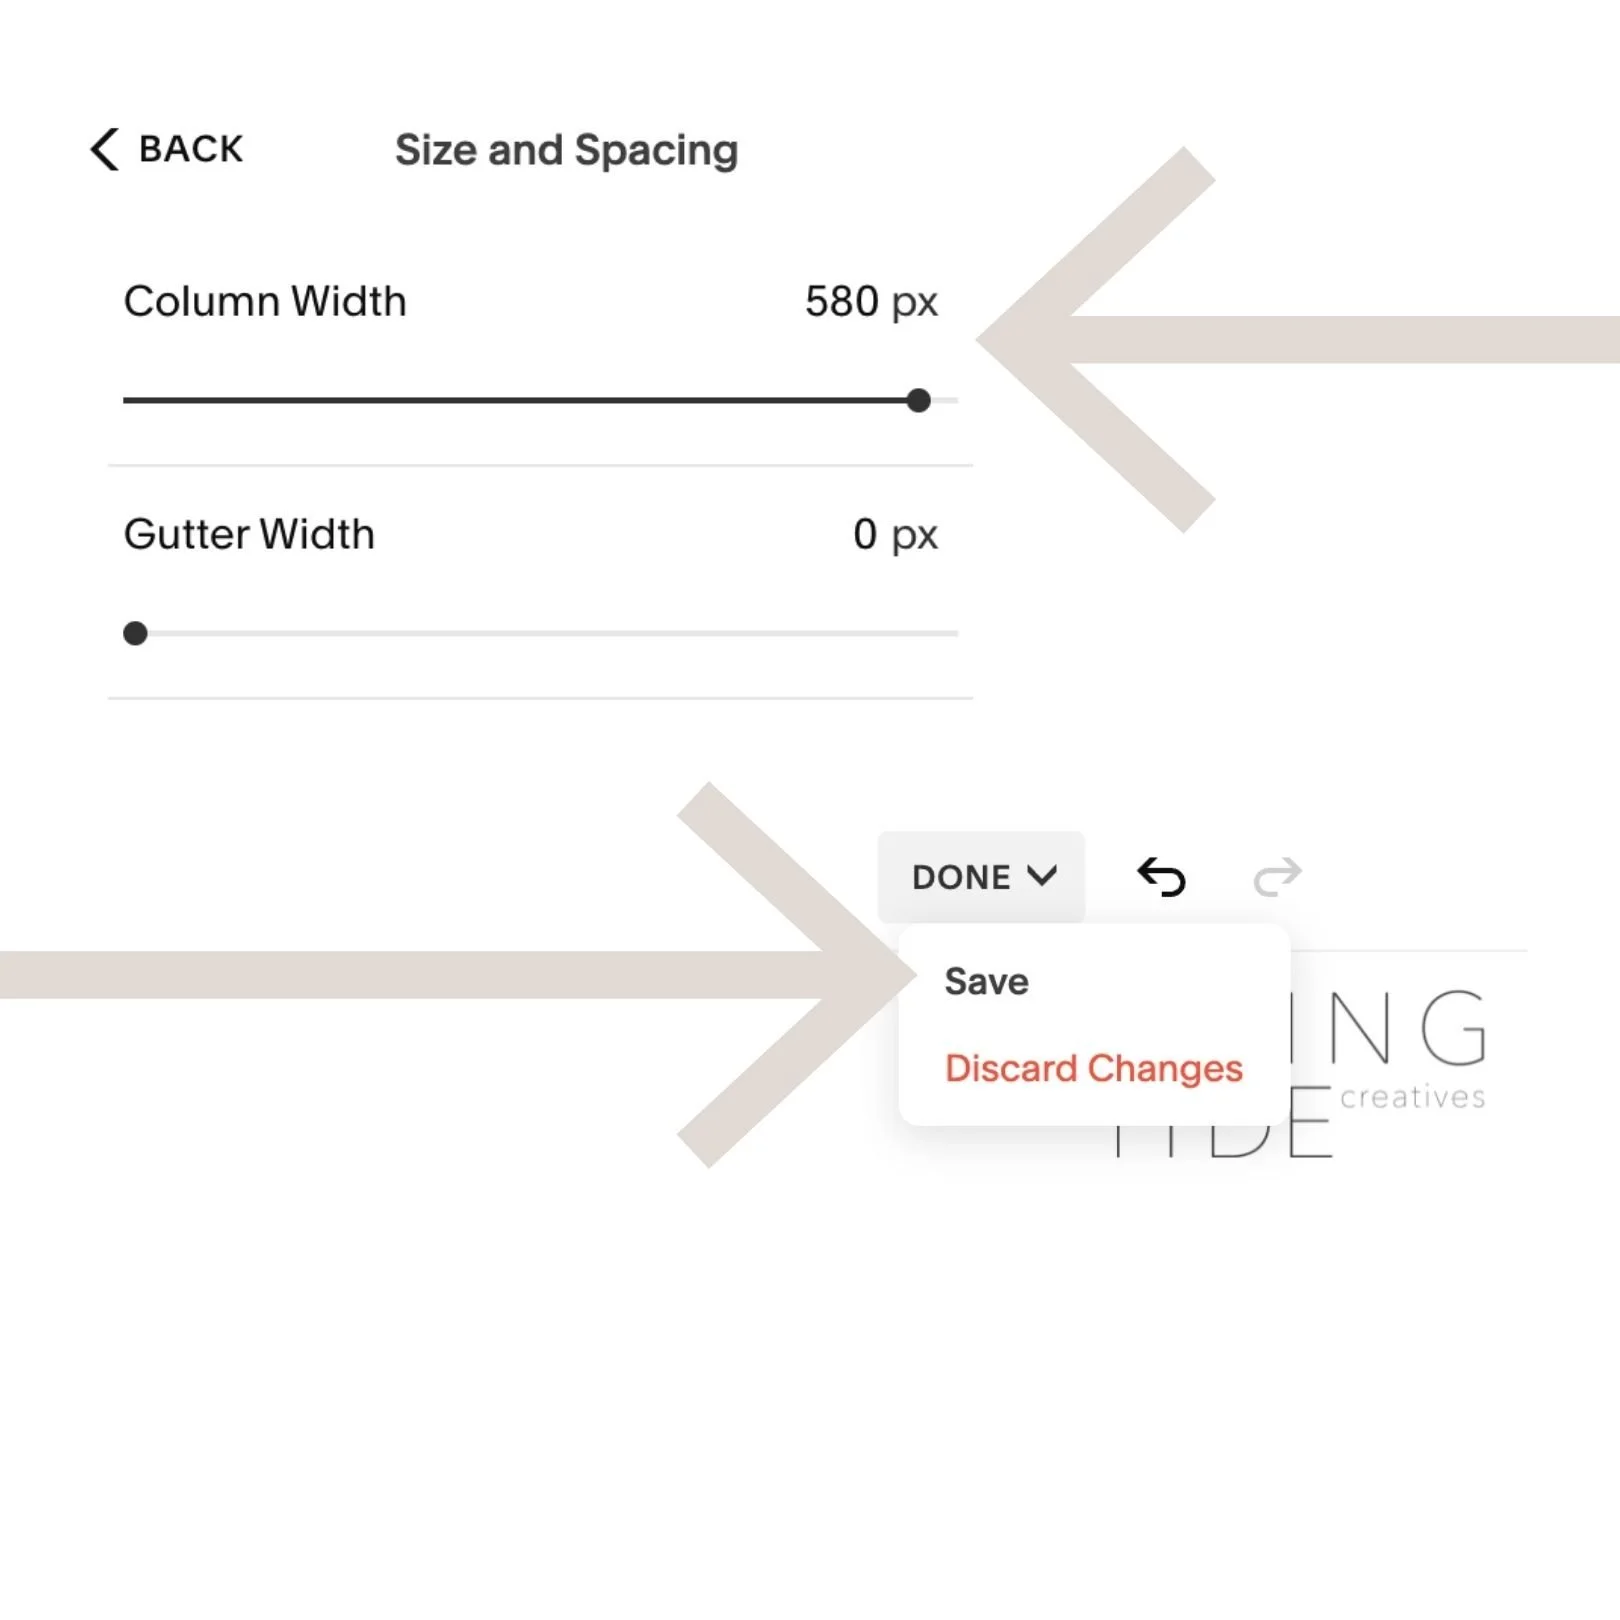
In sizing and spacing set “column width” to the maximum.
Exit the summary block editing and click done and save at the top left of your blog page.
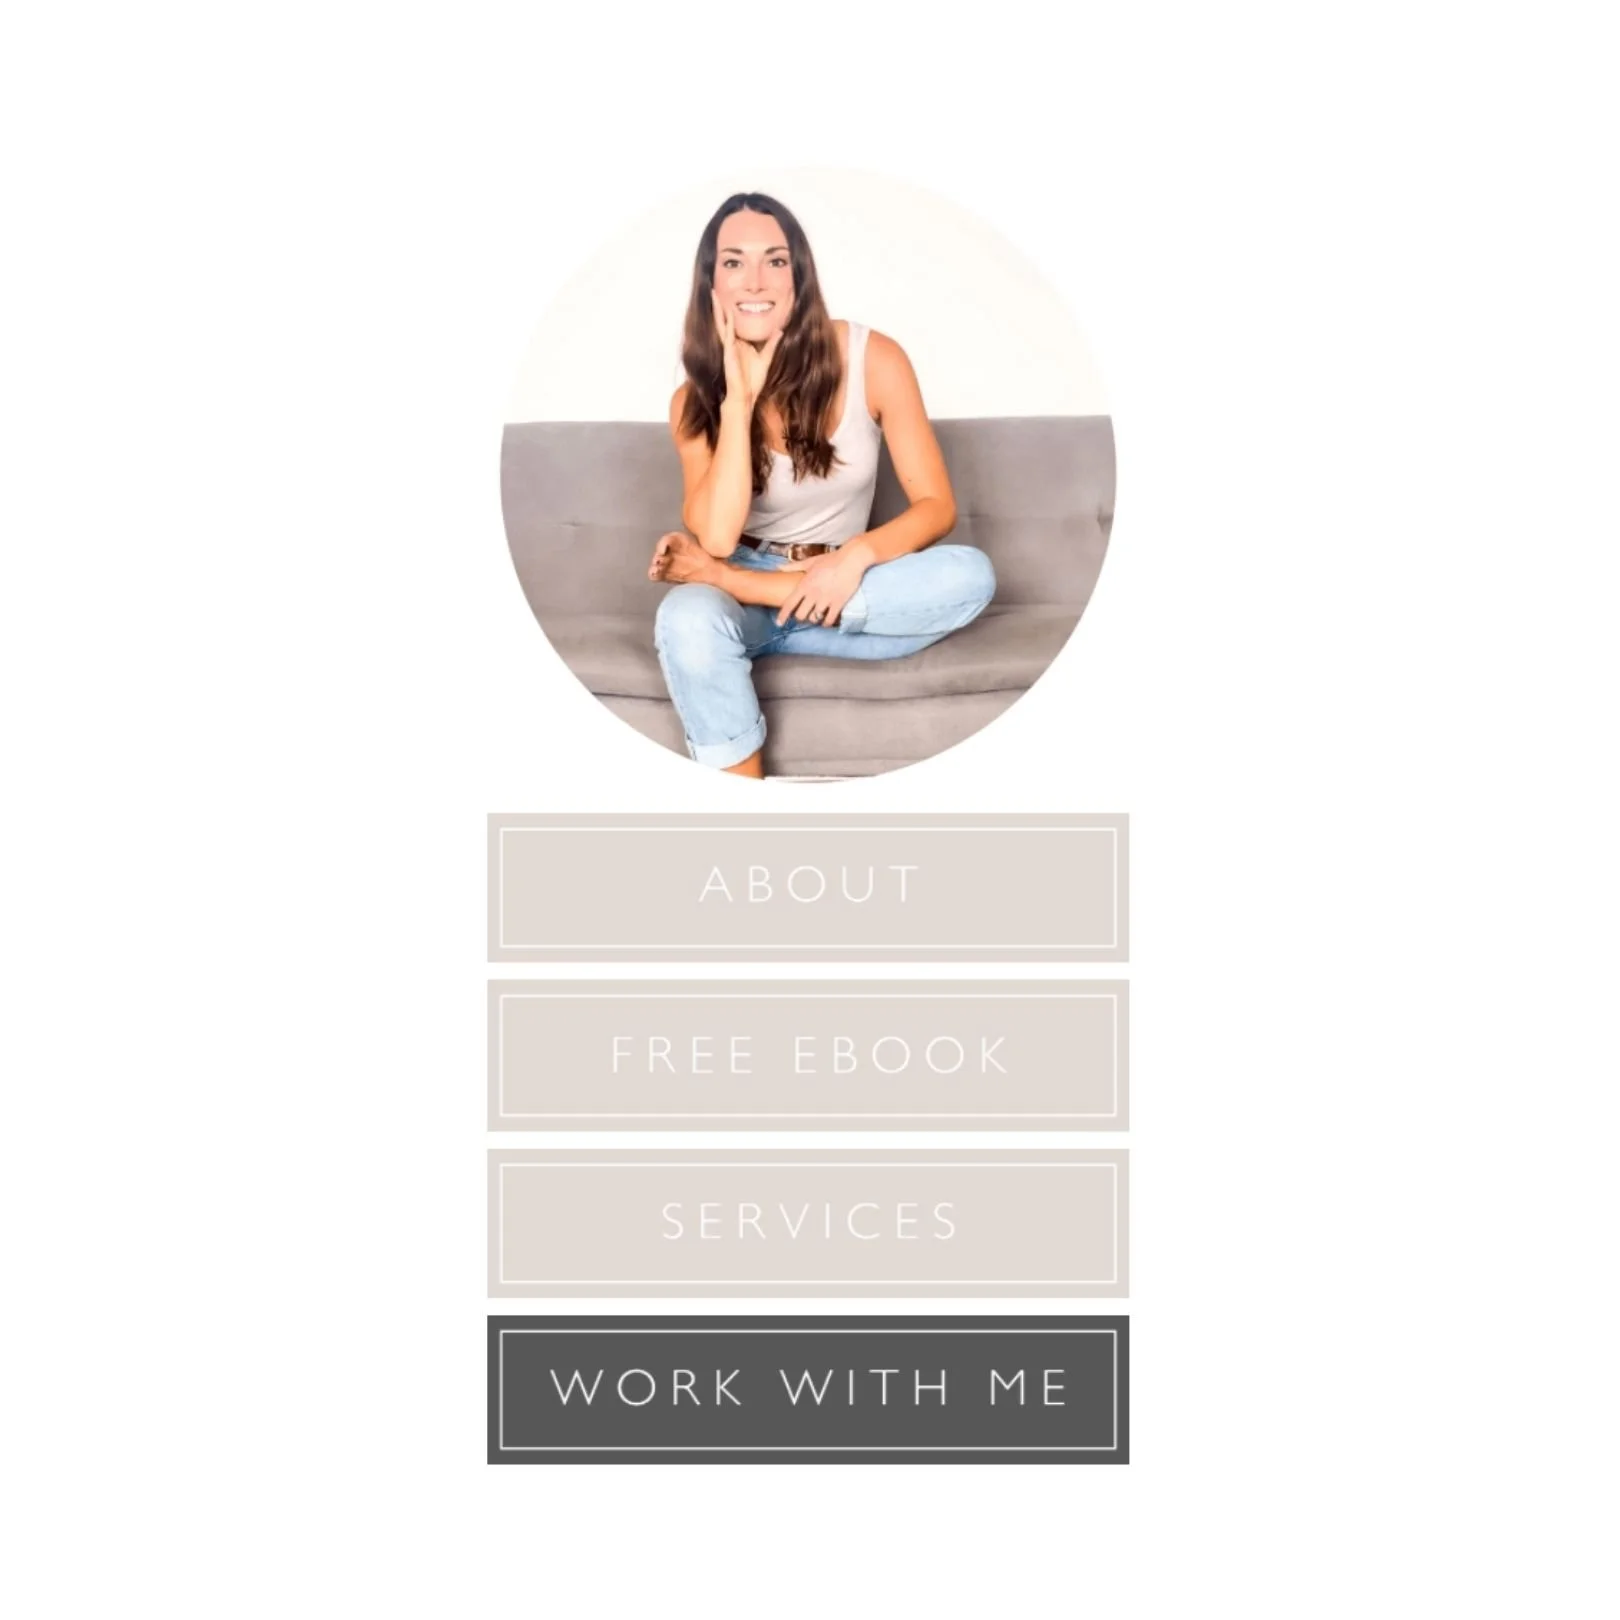
And voila! You have a template blog post with a sidebar you can now duplicate every time you want to add a blog to your Squarespace website.
Bonus tip…
The way we have set up your blog sidebar looks great on desktop, but is likely to look a little bit funny on mobile. I prefer to skip a blog sidebar entirely on mobile, so to do this you will need to do do one of the following steps.
Hide Squarespace blog sidebar on mobile
If you aren't using any other 1 column grid summary blocks in your blog posts (for example I use only carousel summary blocks to show off my other blogs) we can hide all grid summary blocks across all of our blog collection on mobile by inserting this code snippet into your CSS panel in the Design section:
@media only screen and (max-width: 640px) {
    .blog-item-wrapper {
    .summary-block-collection-type-blog-single-column{
  display:none
    }
  }
}
Hide each sidebar summary block on mobile
If you’re keen to keep using 1 column grid summary blocks on your blog posts for things other than your sidebar we will need to resort to using the block ID for your summary block to hide it on mobile.
This is not my preferred method as it needs doing each time you add a blog post to your website.
To do this, you will need to find the Block ID for the summary block on your blog post - you can do this by downloading the Chrome Extension by Heather Tovey. Using it to identify the block ID, and then pasting the below code snippet into the CSS panel of your website, replacing the block ID with the one you copied using the ID finder.
@media only screen and (max-width: 640px){
  #YOURBLOCKIDGOESHERE {
    display: none
  }
}
You will need to do this each time you publish a blog post as the block ID for your sidebar summary block will be different each time.
So there you have it, the simple steps to create a sidebar for your Blog posts in Squarespace 7.1!
Looking for more Squarespace blog inspo? Check out this post filled with the most beautiful Squarespace blog examples!


New on the ‘Gram…